
Self-Host The Ultimate Web Analytics Dashboard - Swetrix
Introduction
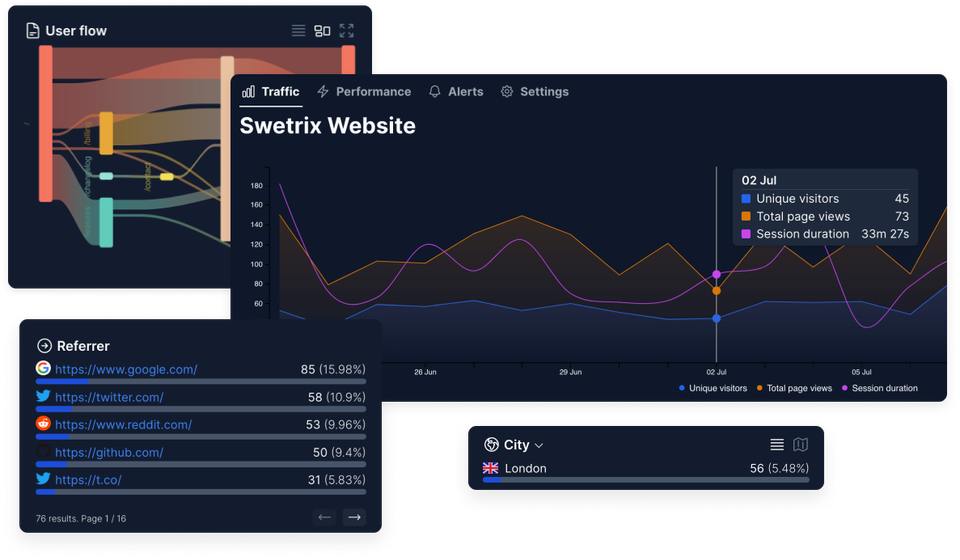
One of the first things that you ever try self-hosting is a website. It’s one of the most fundamental beginning steps in starting your journey in a Home Lab and learning how hosting works. However, what is a website if you can’t learn from the traffic that hits it? In this quick walkthrough, I will explain the steps on how to self-host your own website metrics platform based on Swetrix! Swetrix is an amazing, great-looking analytics dashboard that has the open source and home-lab enthusiast in mind.
Proxmox Setup
Step 1:
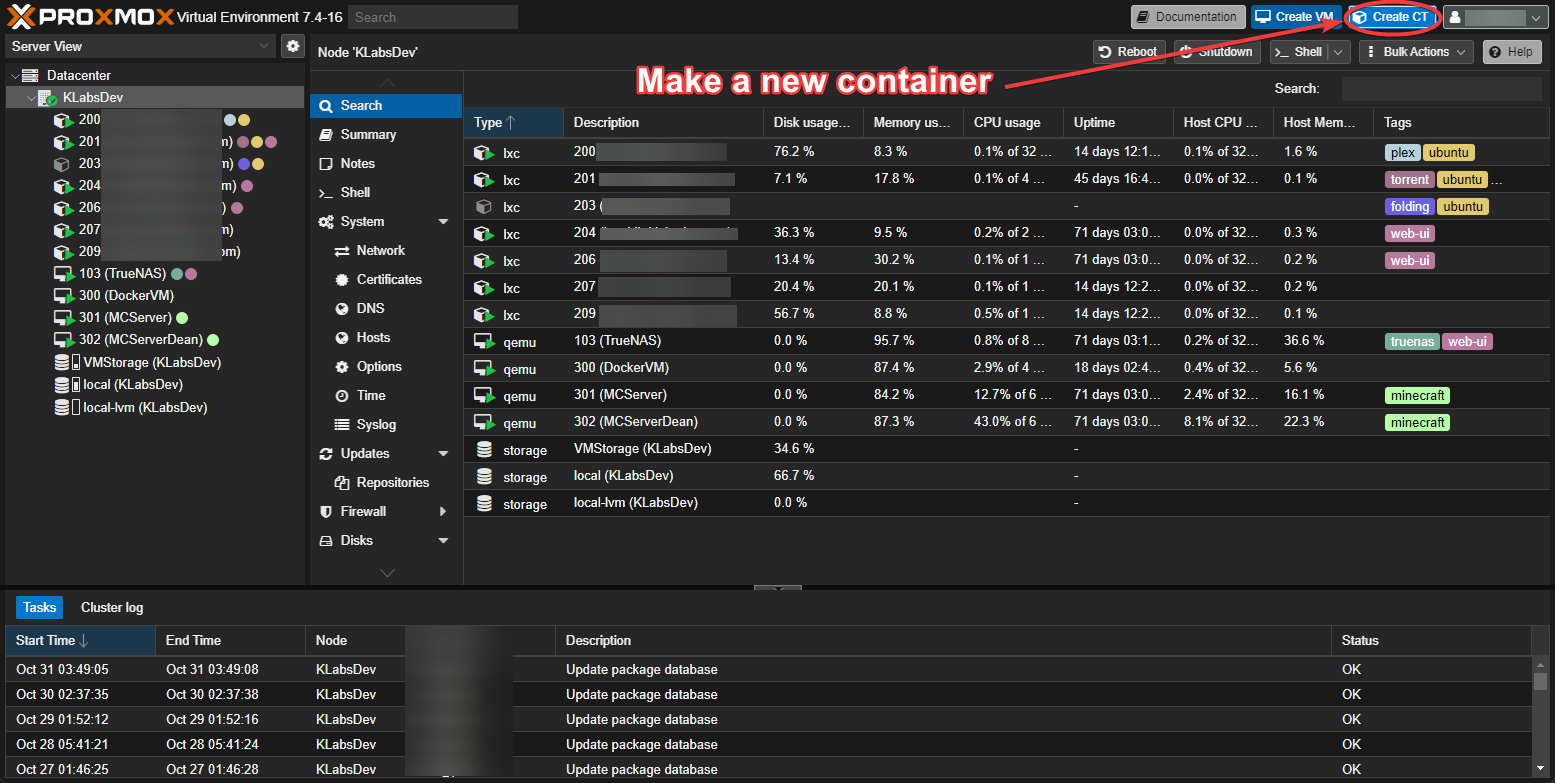
Open your Proxmox web panel and choose "Create CT" in the top right corner.
Step 2:
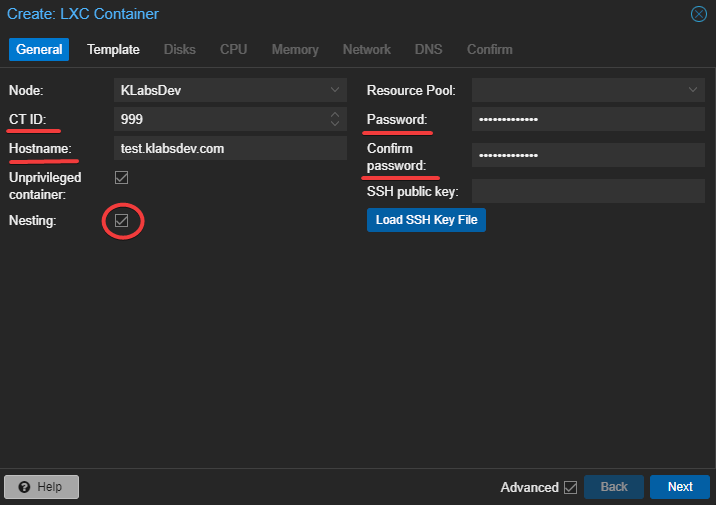
A window will open asking you to input your container information. You will need to enter the Container ID, Hostname, Password, and finally make sure the Nesting option is checked.
Step 3:
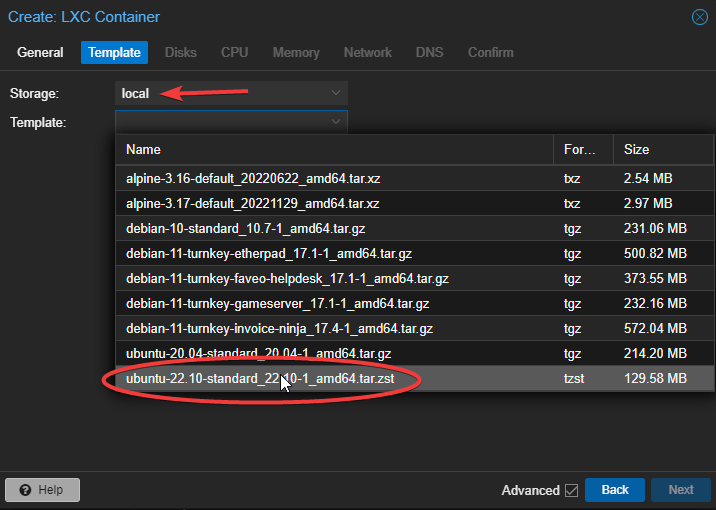
After clicking next, we are asked to choose our container template. For this option we are going to choose our local storage since by default that is where our container templates are downloaded to.
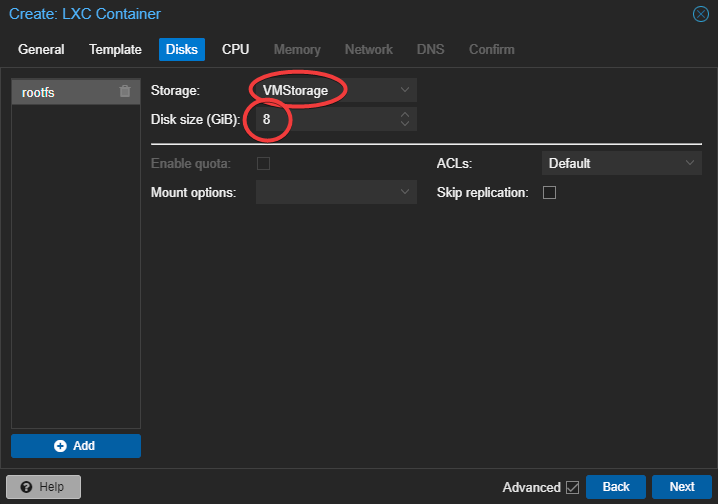
Step 4:
On the Disks tab we are going to choose where the container volume exists. For my example I have a dedicated storage volume set for containers and VMs. I will be using that. However if you use local-lvm, there is nothing wrong with that. For this example I will leave the default 8GB of storage used but you can always add more storage later.
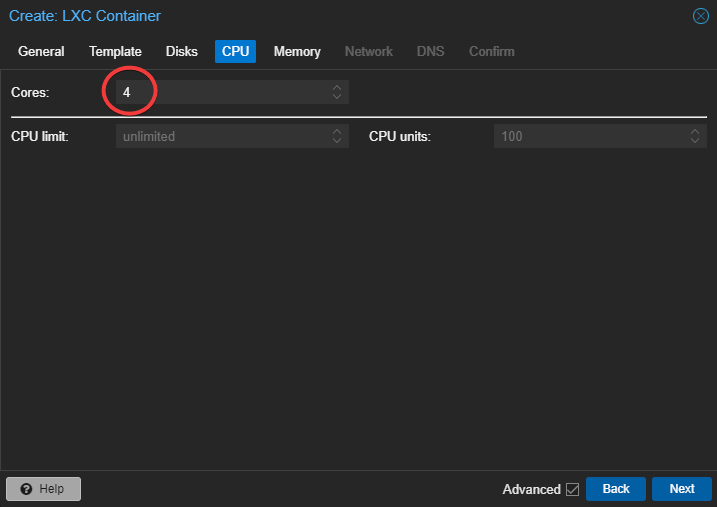
Step 5:
Next, Proxmox is going to ask how many CPU cores we would like to use. While working on the VM and setting everything up I will allow it to use up to 4 cores. However, once it is set up and running I will change this to only a single core.
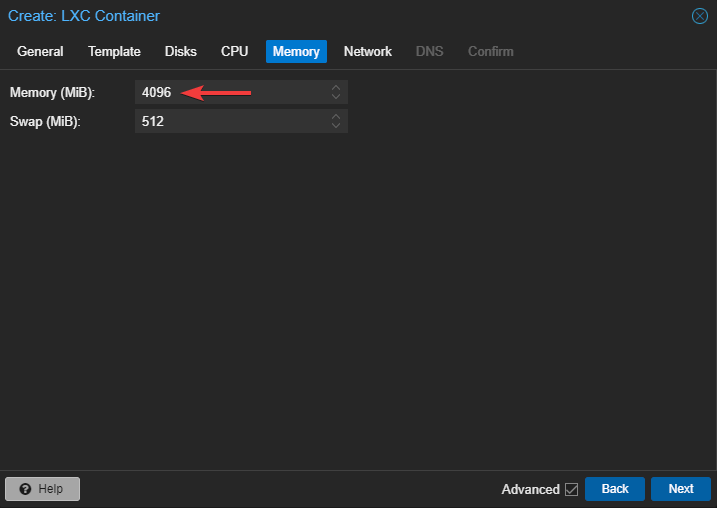
Step 6:
Next, we need to set the amount of memory that this container can use. For setup I like to allow the container 4GB (4096mb) of memory and then scale that back once the container is up and running. From my testing, you can leave Swap at 512mb of memory. Again, you can always scale that back if you would like.
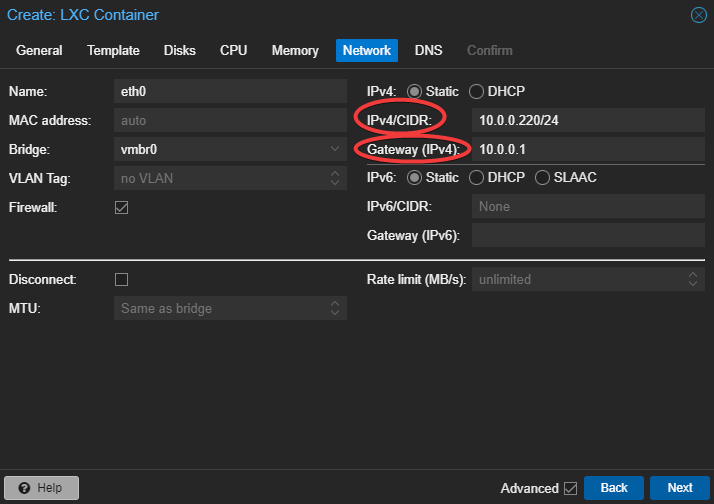
Step 7:
We will now need to set up the networking for this container. In this example I am going to be using the standard eth0 interface and the vmbr0. These are typically the defaults when making a new container. However you will need to set the container's local static IP address/CIDR and your network's gateway. The gateway is typically the IP address of your router.
Step 8:
The last step is going to ask if you want to set up custom DNS options. Unless you have an advanced network setup you can leave these options blank. Then, once you are on the Confirm tab, you can check the button on the lower left to "Start after created".
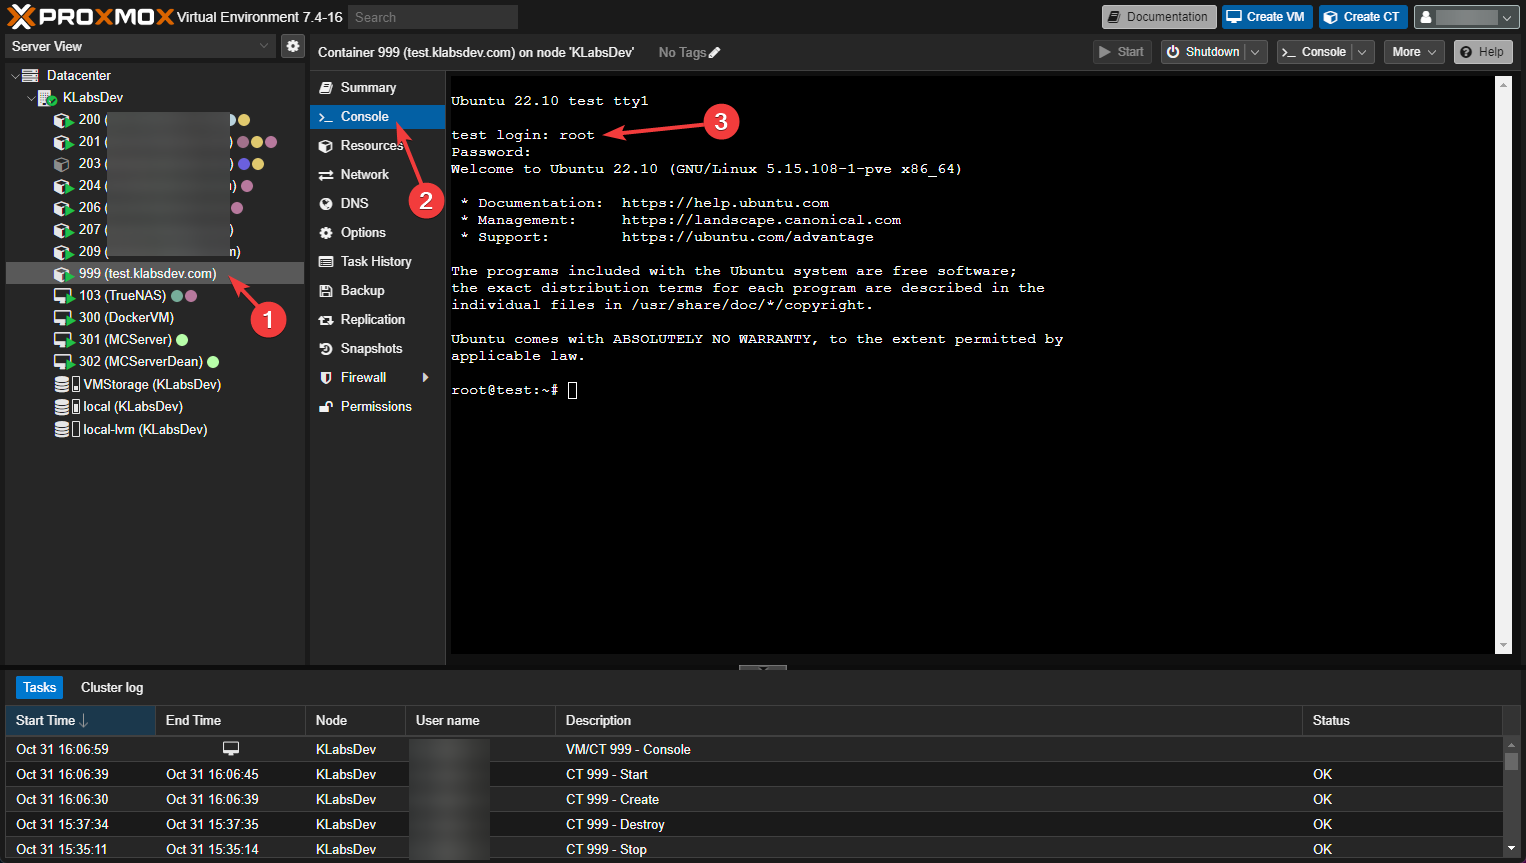
Step 9:
After a few moments the container will start up. Click on it and then click on the Console tab to begin setting up Swetrix. The default username is root
Swetrix Setup
Step 1:
First we need to make sure the container is up to date and has the latest version of git and docker-compose installed.
apt update && apt upgrade
apt install git docker-compose
Step 2:
Next, clone the Github repo to your container.
git clone https://github.com/swetrix/selfhosting
Then, enter the directory that was created
cd selfhosting
Step 3:
Once here, you will need to open the docker-compose.yml file and adjust a few lines. In this example we will use Nano.
nano docker-compose.yml
Once opened, you will need to edit these environment variables:
| Variable | Note |
|---|---|
EMAIL |
email address user will use to log in to the dashboard |
PASSWORD |
password user will use to log in to the dashboard |
JWT_ACCESS_TOKEN_SECRET |
secret for JWT access tokens, basically a random string of 60 characters. |
JWT_REFRESH_TOKEN_SECRET |
secret for JWT refresh tokens, also a random 60 chars string, but this one should be different from the access token secret. |
API_URL |
URL (or an IP address) of the machine you're hosting Swetrix on. |
Once everything has been configured to your liking, we can start the docker container.
Step 4:
Start the docker container:
docker-compose up -d
It will take a while to download all the requirements and get the container started but once you see this you are ready to move onto step 5:
Status: Downloaded newer image for swetrix/swetrix-fe:v2.1.0
Creating selfhosting_redis_1 ... done
Creating clickhouse          ... done
Creating swetrix-api         ... done
Creating selfhosting_swetrix_1 ... done
Step 5:
You can now, in a browser, navigate to the IP address we set earlier for the container and access your own Swetrix dashboard. This will be the IP address of the container we set up in Proxmox Setup - Step 7. You will now see a sign-in page for Swetrix. In this example it was 10.0.0.220.

Conclusion
Running your website analytics in a decentralized platform does have its pros and cons. One of the main benefits being you get to avoid other data collecting platforms from learning or using your collected data to profile you or the service you are tracking. However, I do see one of the downsides to this style of setup being that your data could suffer accuracy if you ever experience downtime. But as with most things in the self-hosting space, this is a very cool way to learn about using Docker and learning the ropes of useful website data collection.
Thanks for reading!
Written By: Max Kulik
Sources
- Swetrix Selfhosted v2 is released!
- Swetrix Self-Hosted Github
- Swetrix Self-Hosting setup documentation