
The Definitive Guide to Running MacOS in Proxmox

Introduction
There are a few different ways to install macOS on Proxmox, but most of them require you to own a Mac already. In this guide, we will go over both how to install MacOS inside Proxmox with and without owning a Mac already. Most guides would require you to download and create an for your installation. I will provide steps for both installing with and without a Mac.
Huge thanks for i12bretro tutorials as most of this come from their tutorials. I wanted to re-create them with screenshots for others to follow and offer the ISO images for anyone without a Mac to build them! The tutorials this one is based off of are listed below in the sources list.
Requirements
If you would like to create your own MacOS images you will need to do this on a pre-existing Mac that you may own or have created. If you would like to simply download an image, then you can proceed to the Installation steps.
Download & Prepare a MacOS Image
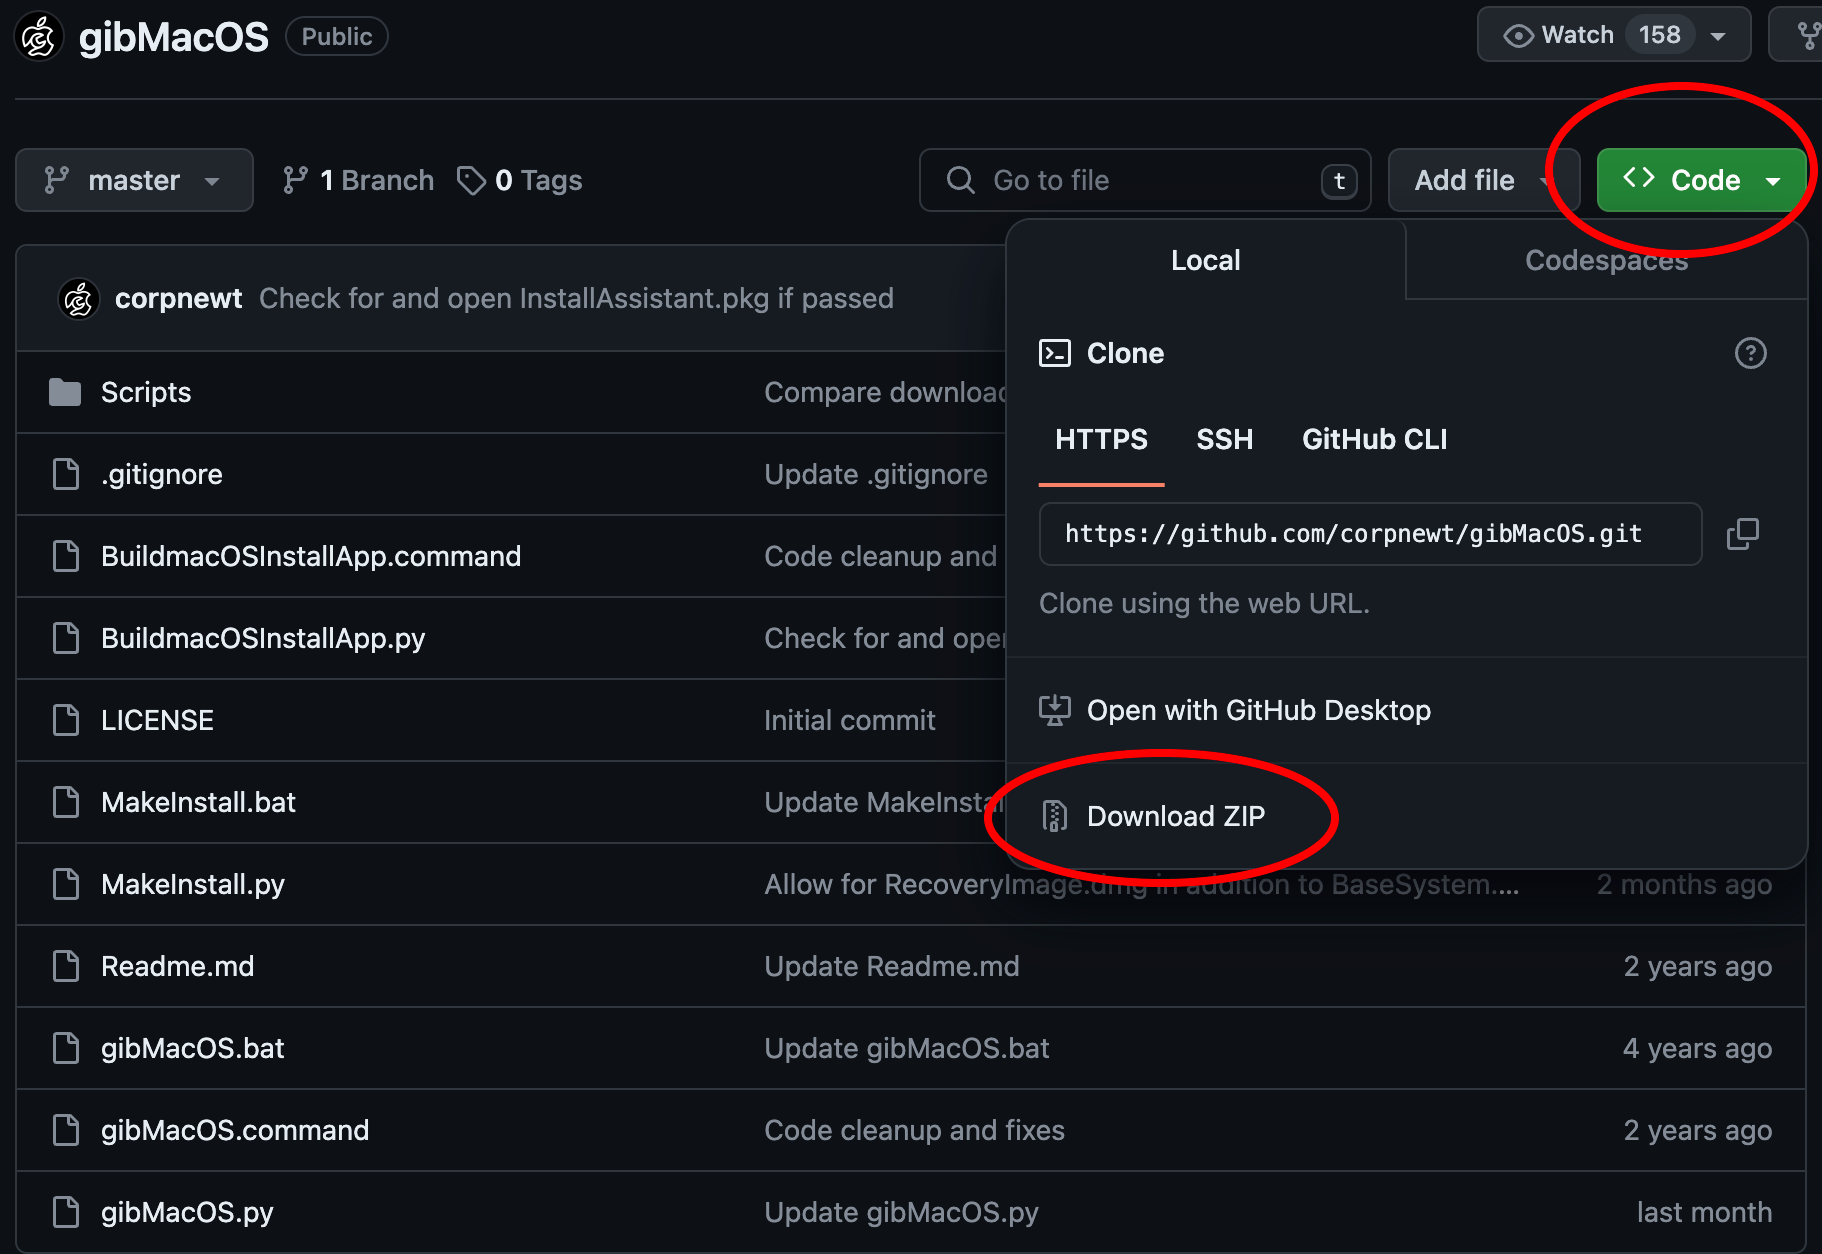
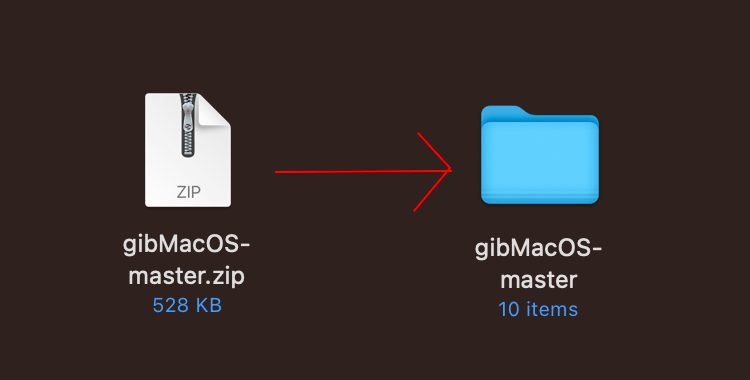
Step 1) On a Mac, we will begin by downloading gibMacOS from Github. Double-click on the downloaded .zip file to extract it. Then enter the extracted folder.
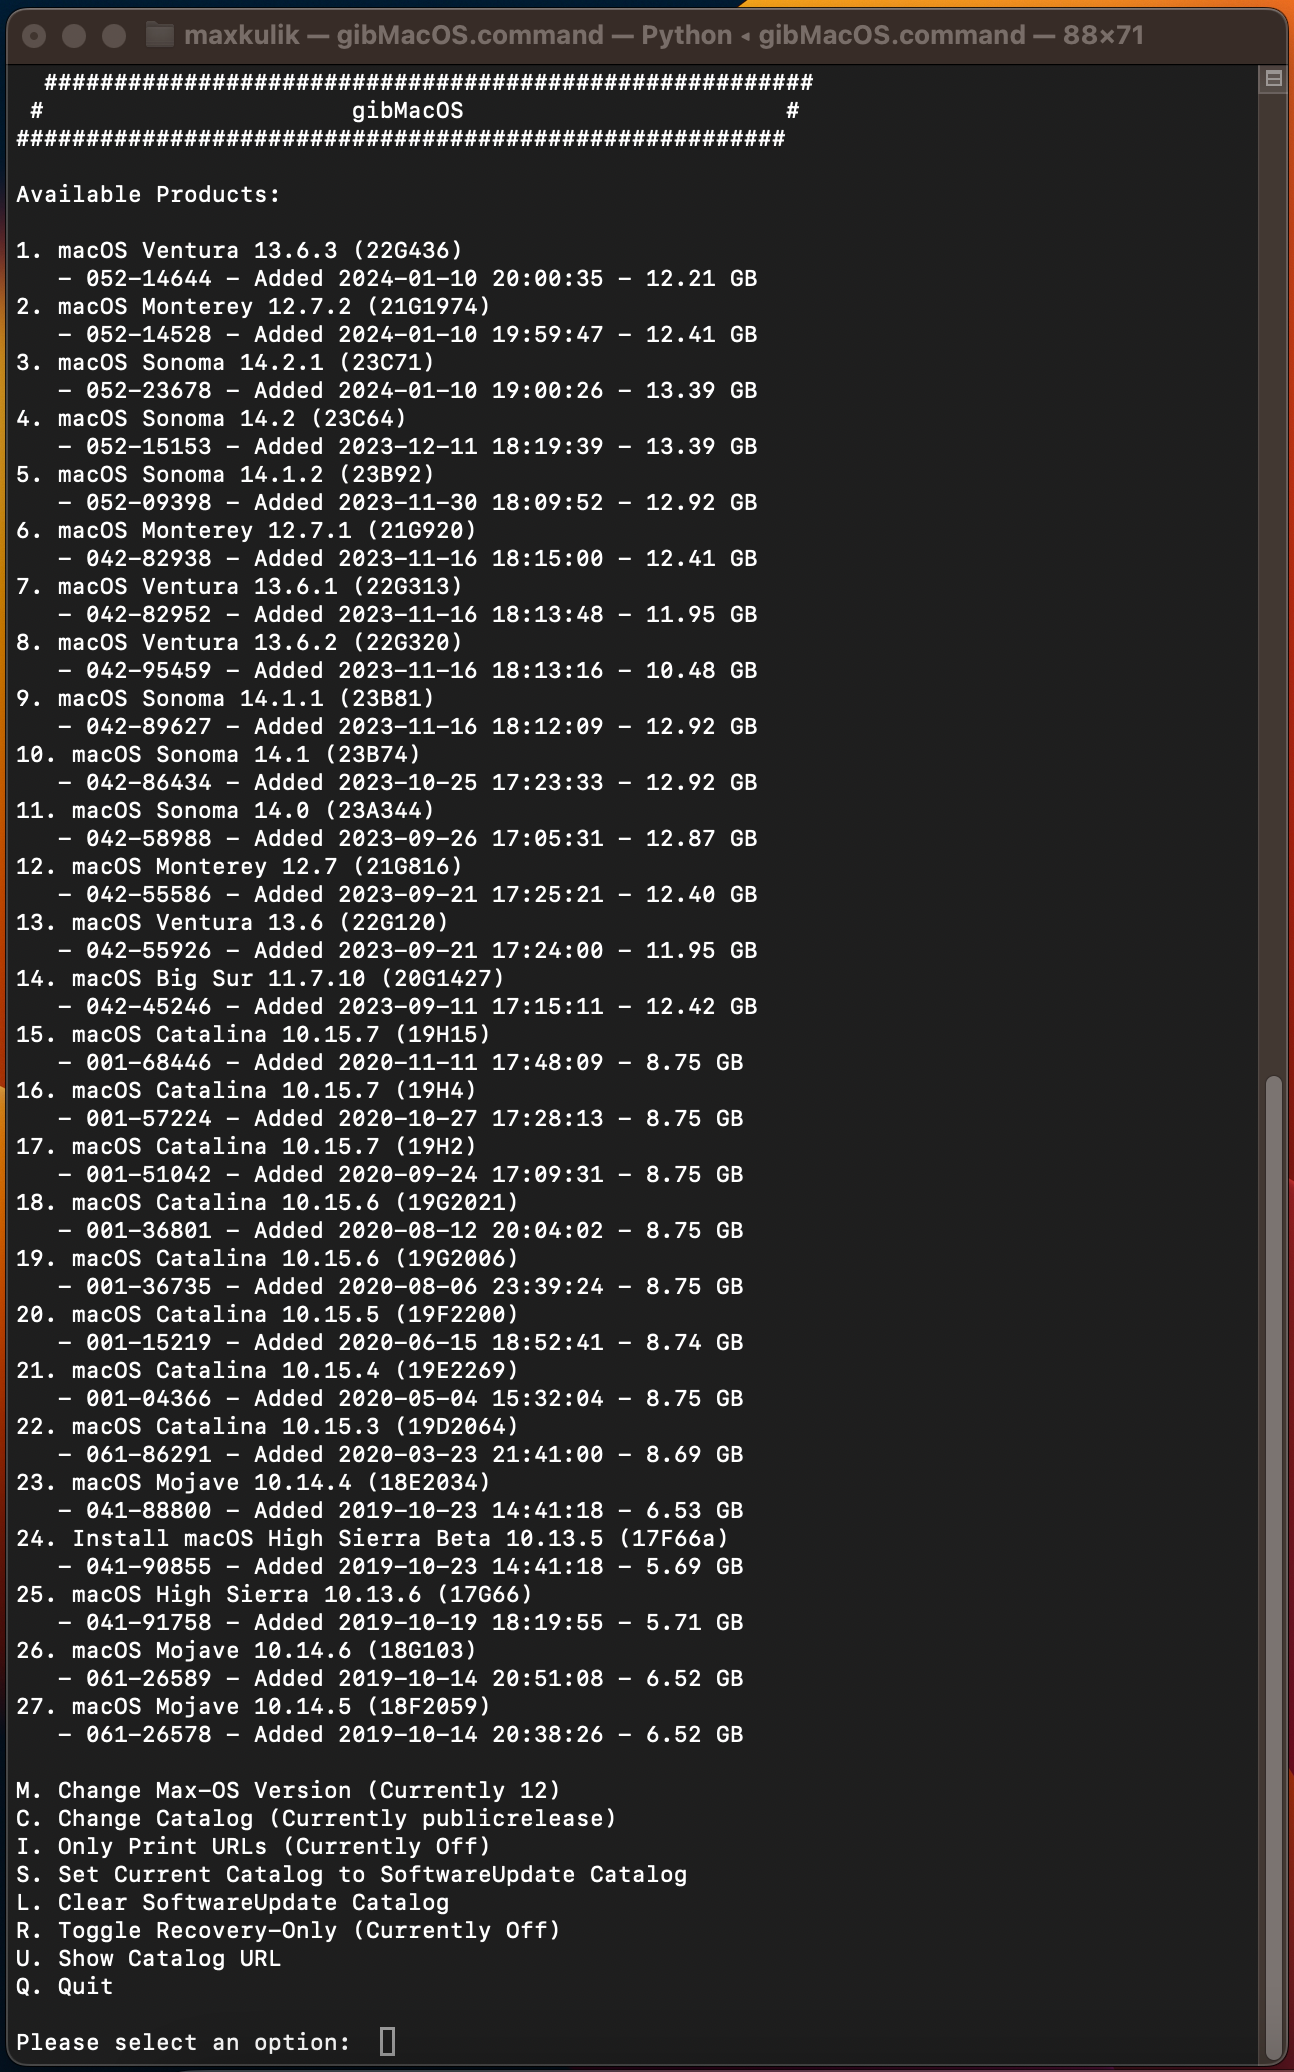
Step 2) Now we need to enter the extracted folder and double-click on the gibMacOS.command file.

Step 3) Once the script has finished installing Python, you will now be at a screen in the terminal asking what version of MacOS you would like to download. In this example, we will be using MacOS Sonoma 14.1.1. So I will be choosing option 9.
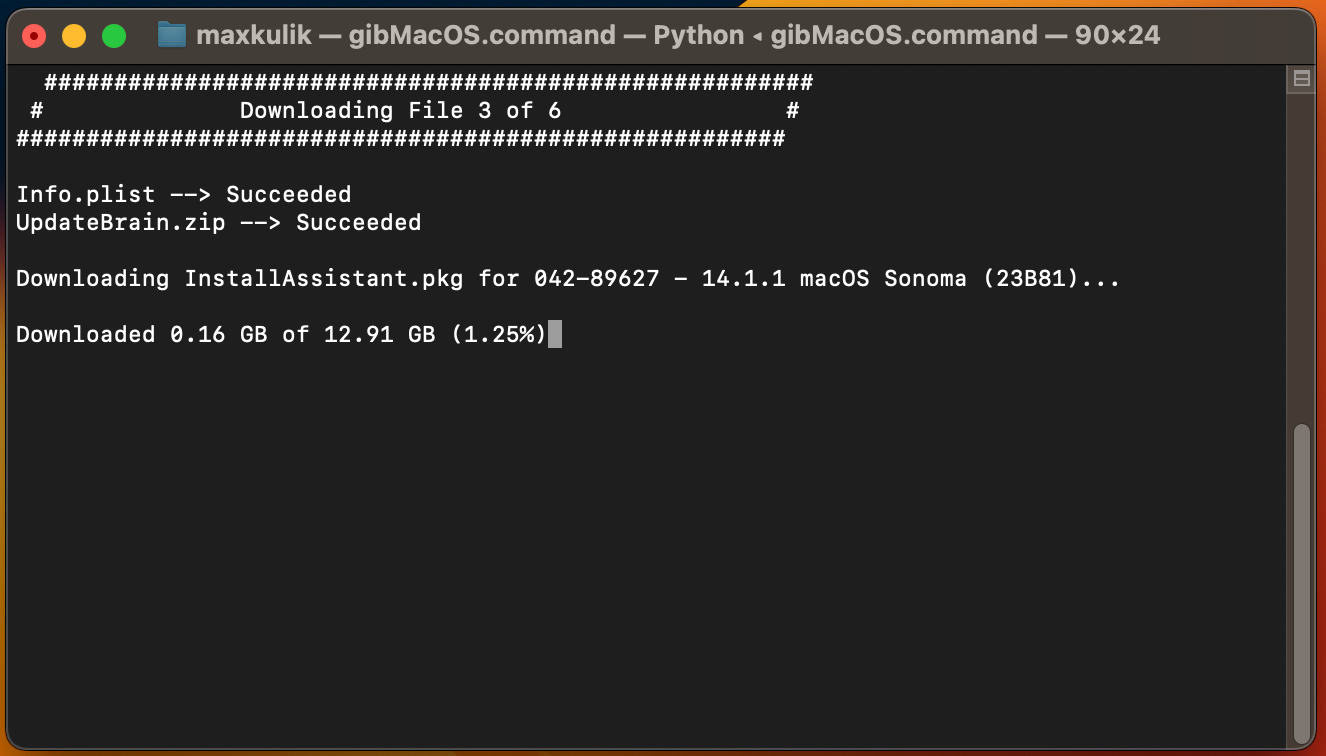
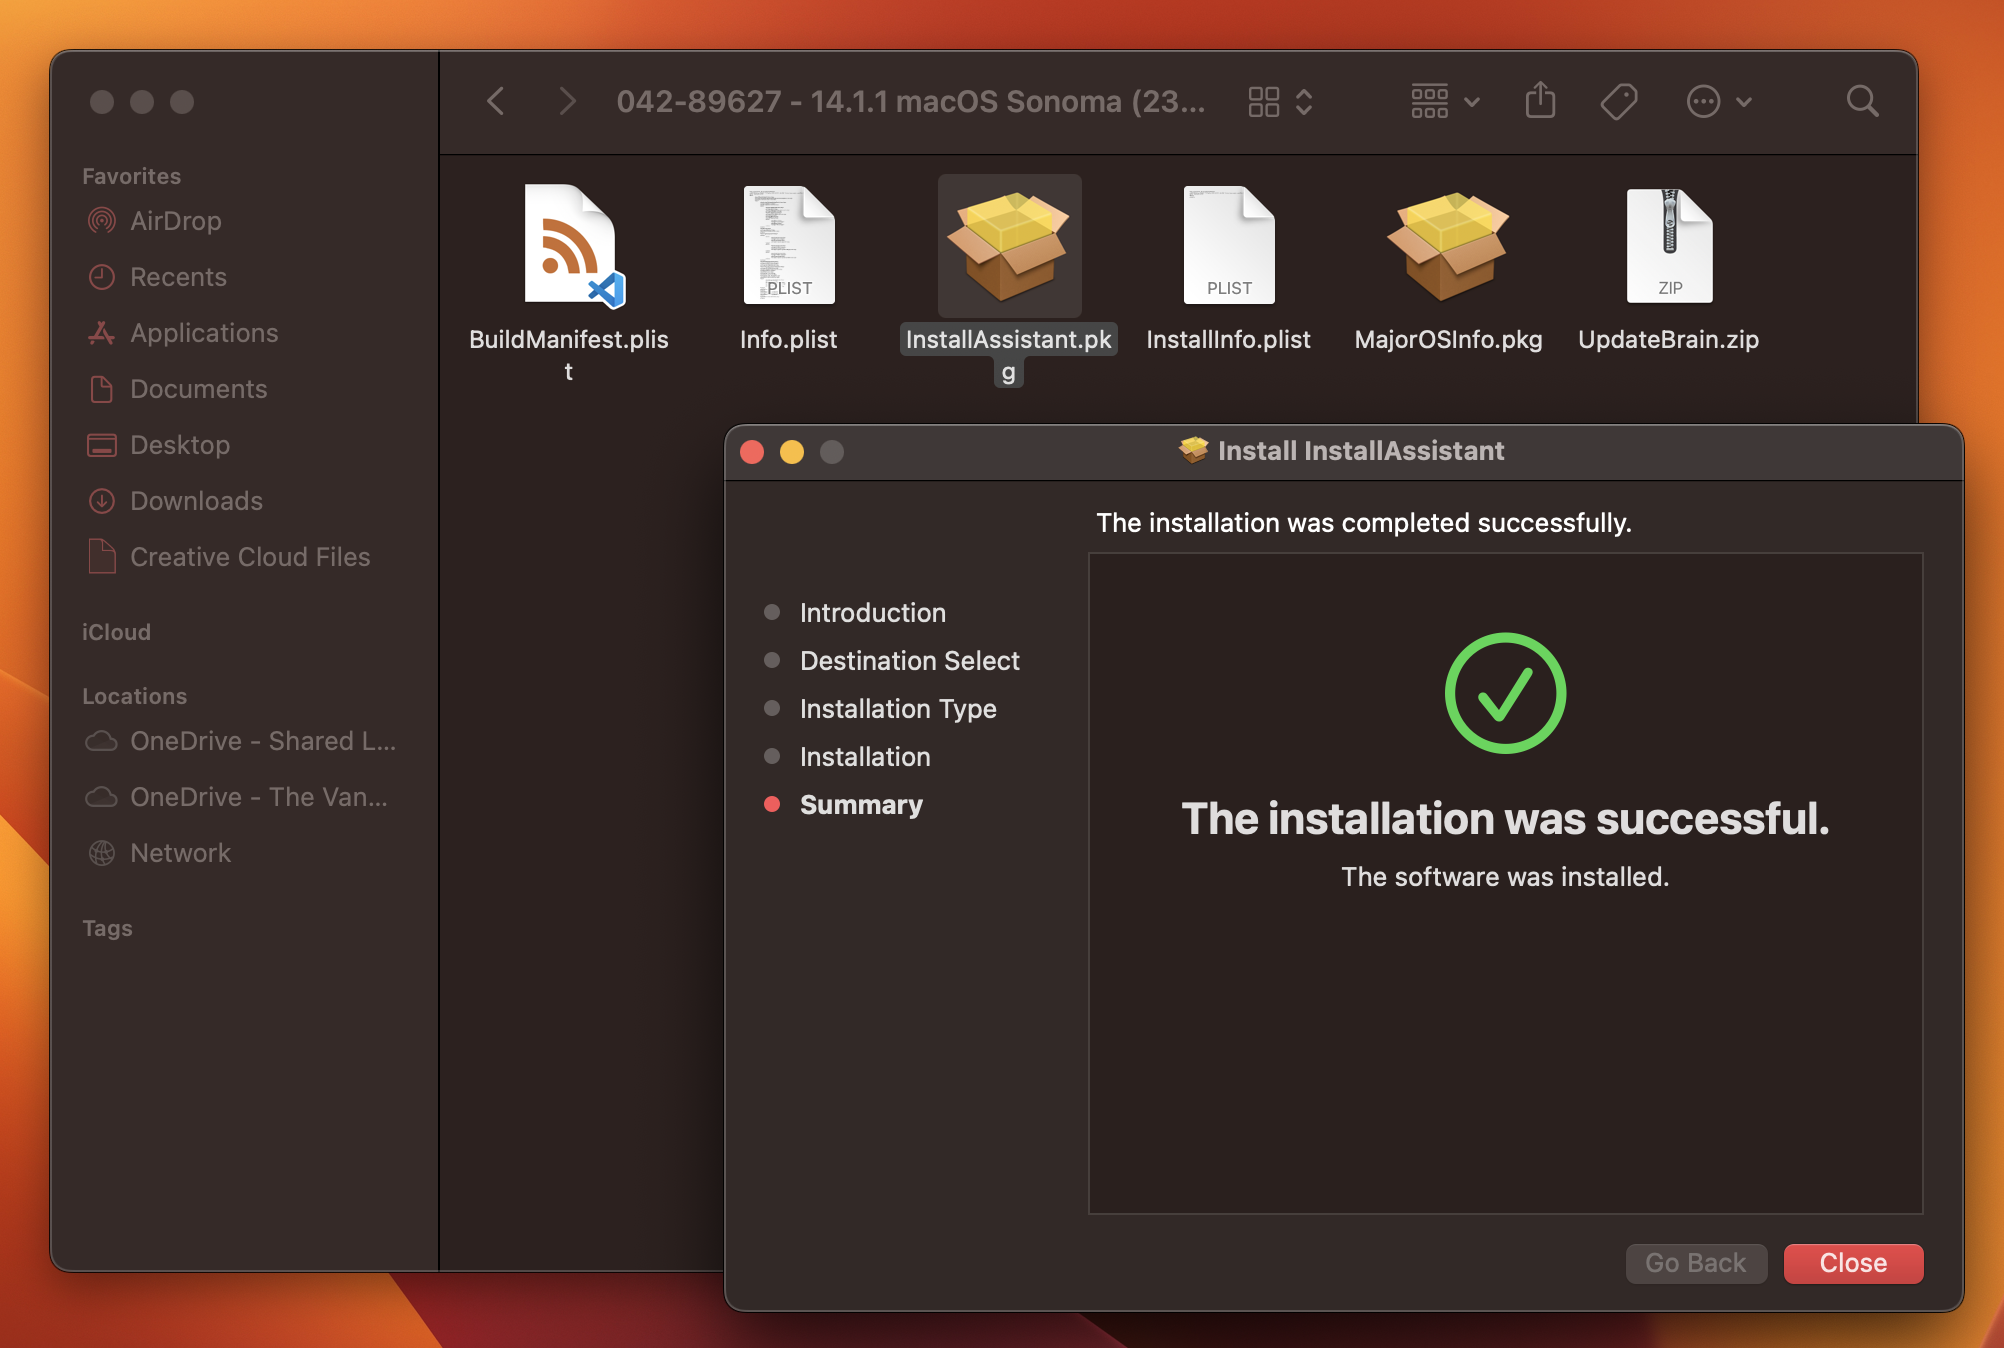
Step 4) Once the download has completed, enter the newly created download folder. If you ran from your downloads folder it will look like ~/Downloads/gibMacOS-master/macOS Downloads/publicrelease/042-89627 - 14.1.1 macOS Sonoma (23B81)/ if following this directly. Your version numbers may differ if you are downloading a different version of MacOS. Inside this folder, you will need to double-click on the InstallAssistant.pkg application. Follow the prompts to install. This installs the application we will be using to build our Proxmox friendly ISO image.
Step 5) Next, we will begin building out Proxmox ISO image. In a new terminal window, you will need to create a temporary disk image. You will need to ensure it is larger than the downloaded images from before. For the MacOS Sonoma 14.1.1 image I had luck with a 16GB image.
hdiutil create -o /tmp/macOS -size 16000m -volname macOS -layout SPUD -fs HFS+JStep 6) Next we are going to mount the temporary disk image we just created.
hdiutil attach /tmp/macOS.dmg -noverify -mountpoint /Volumes/macOSISOStep 7) Now we are going to use the program that we previously installed to create an ISO image that can be used with Proxmox. This will take a few minutes to complete.
sudo /Applications/Install\ macOS\ Sonoma.app/Contents/Resources/createinstallmedia --volume /Volumes/macOSISO --nointeractionStep 8) Unmount the image using the following command:
hdiutil detach -force /Volumes/Install\ macOS\ SonomaStep 9) Now we are going to convert our unmounted image to an ISO file that can be uploaded directly to Proxmox using this command:
hdiutil convert /tmp/macOS.dmg -format UDTO -o ~/Desktop/macOS-Sonoma.cdrStep 10) Finally, change the file extension from .cdr to .iso.
mv ~/Desktop/macOS-Sonoma.cdr ~/Desktop/macOS-Sonoma.isoStep 11) The last thing we should do is a little housecleaning! We just need to remove the temp image.
rm /tmp/macOS.dmgPre-Existing Images
This table is a list of MacOS images that I have already created. You can you can use these directly with Proxmox if you do not have a Mac to make your own.
| MacOS | Version | Download |
|---|---|---|
| Sonoma | 14.1.1 | https://cdn.klabsdev.com/MacImages/macOS-Sonoma-14.1.1.iso |
| Sonoma | 14.1 | https://cdn.klabsdev.com/MacImages/macOS-Sonoma-14.1.1.iso |
| Sonoma | 14.0 | https://cdn.klabsdev.com/MacImages/macOS-Sonoma-14.1.1.iso |
| Ventura | 13.6.3 | https://cdn.klabsdev.com/MacImages/macOS-Ventura-13.6.3.iso |
| Ventura | 13.6.2 | https://cdn.klabsdev.com/MacImages/macOS-Ventura-13.6.2.iso |
| Ventura | 13.6.1 | https://cdn.klabsdev.com/MacImages/macOS-Ventura-13.6.1.iso |
| Ventura | 13.6 | https://cdn.klabsdev.com/MacImages/macOS-Ventrua-13.6.iso |
| Monterey | 12.7.1 | https://cdn.klabsdev.com/MacImages/macOS-Monterey-12.7.1.iso |
| Monterey | 12.7 | https://cdn.klabsdev.com/MacImages/macOS-Monterey-12.7.iso |
Proxmox Installation
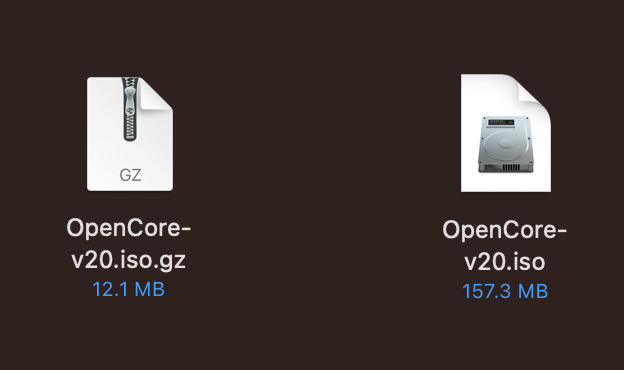
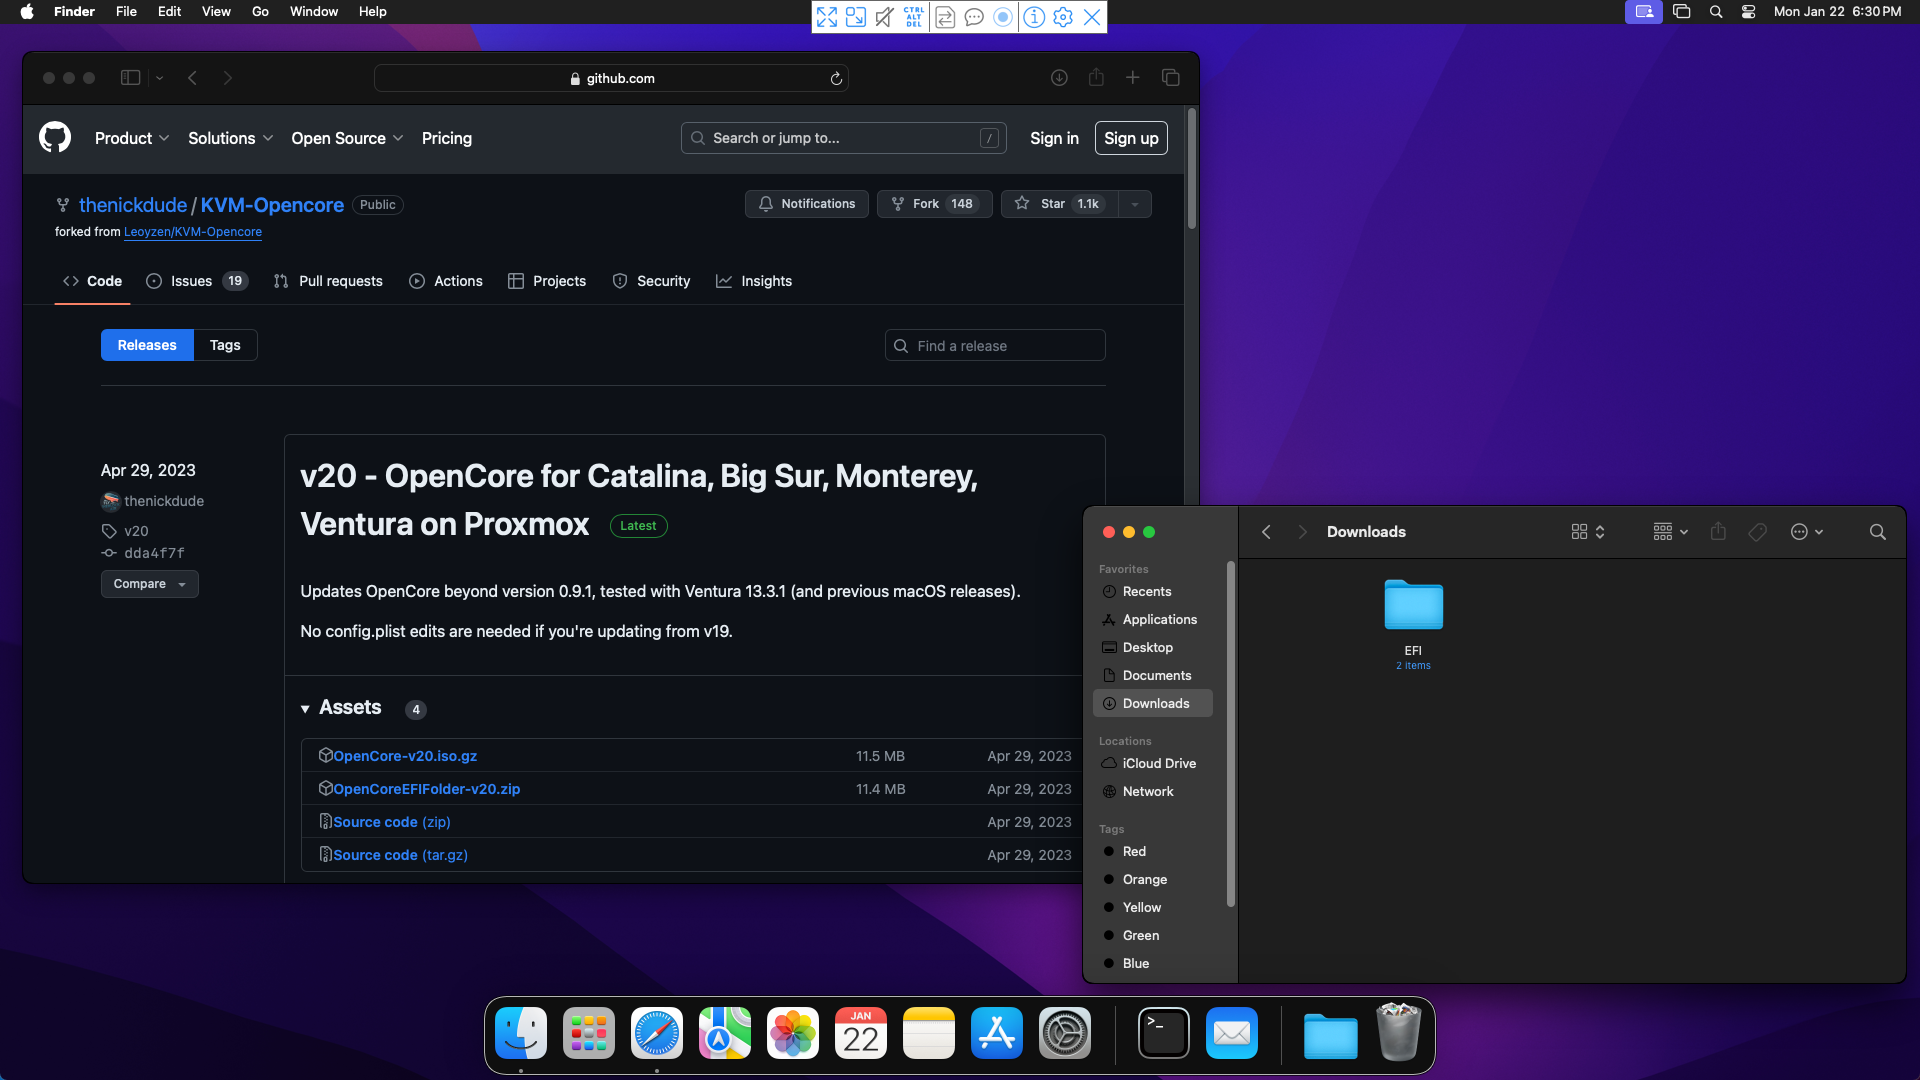
Step 1) Now that our MacOS image is ready, we will can begin the Proxmox setup. First we will need to head over to Github again and download the KVM OpenCore Bootloader. You'll want to navigate to the releases tab and download the .iso.gz file. Once downloaded, extract the ISO image from the GZ file.
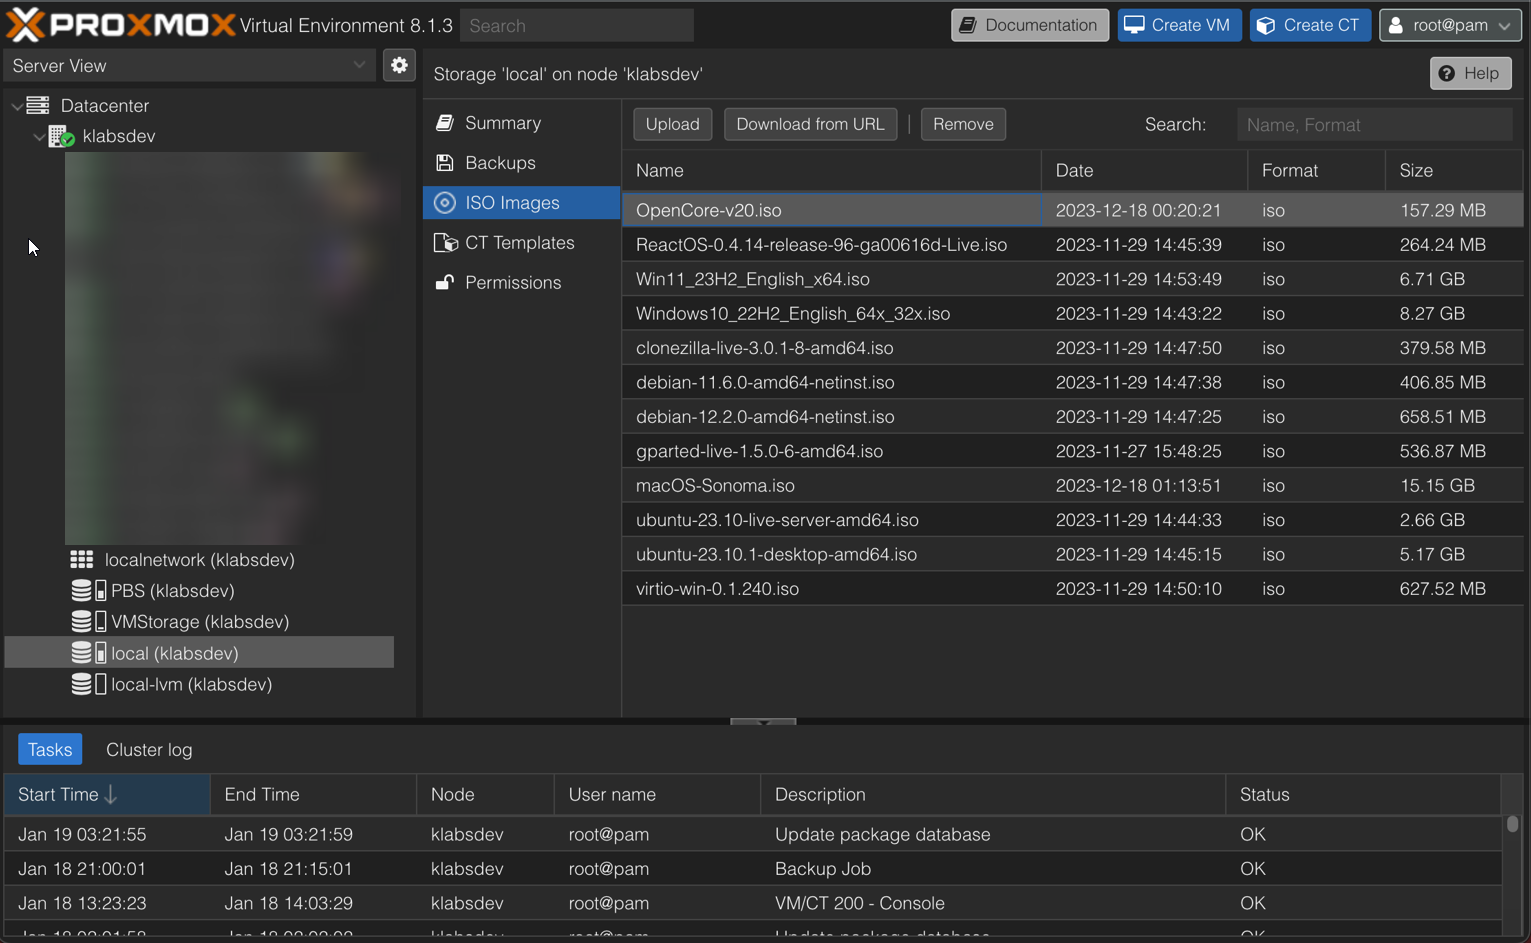
Step 2) Open and log into your Proxmox server's web UI. You will want to upload the OpenCore-v20.iso file to your server's ISO library. You will also want to upload the MacOS.iso image you have either downloaded or created!
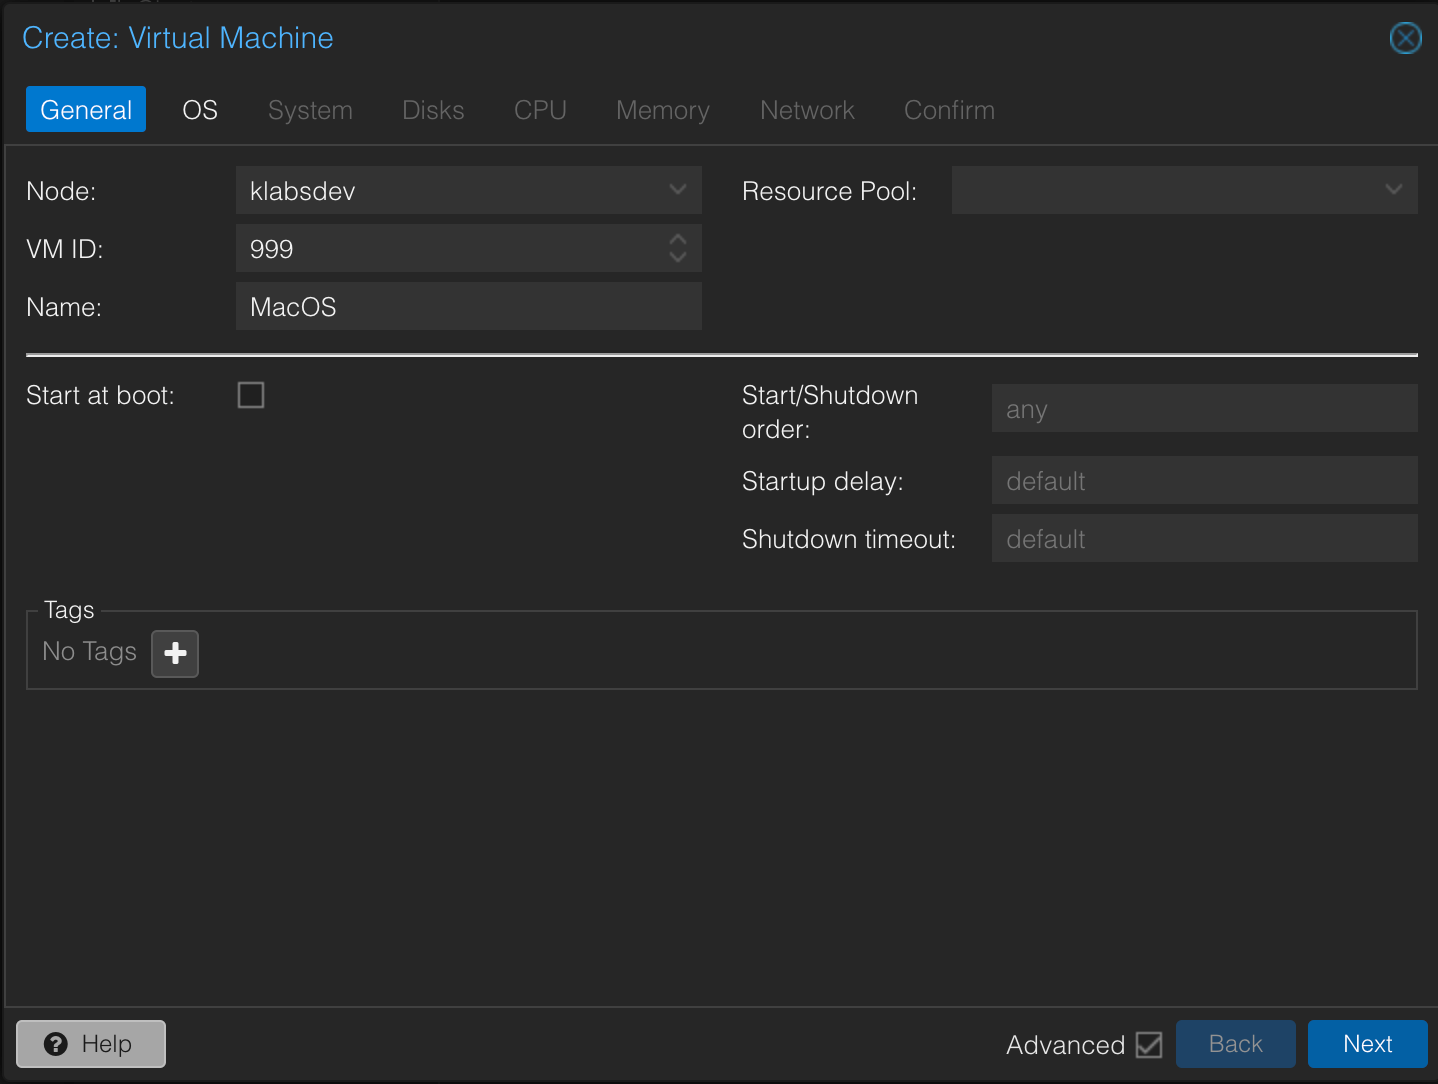
Step 3) We are now going to create the VM that will run MacOS! In the top right corner of the Proxmox Web UI choose "Create VM". Match your settings to the following screenshots.
Choose your VM's ID in this example we will choose 999. Also, create your VM name. In this example I will choose MacOS. Then click Next.
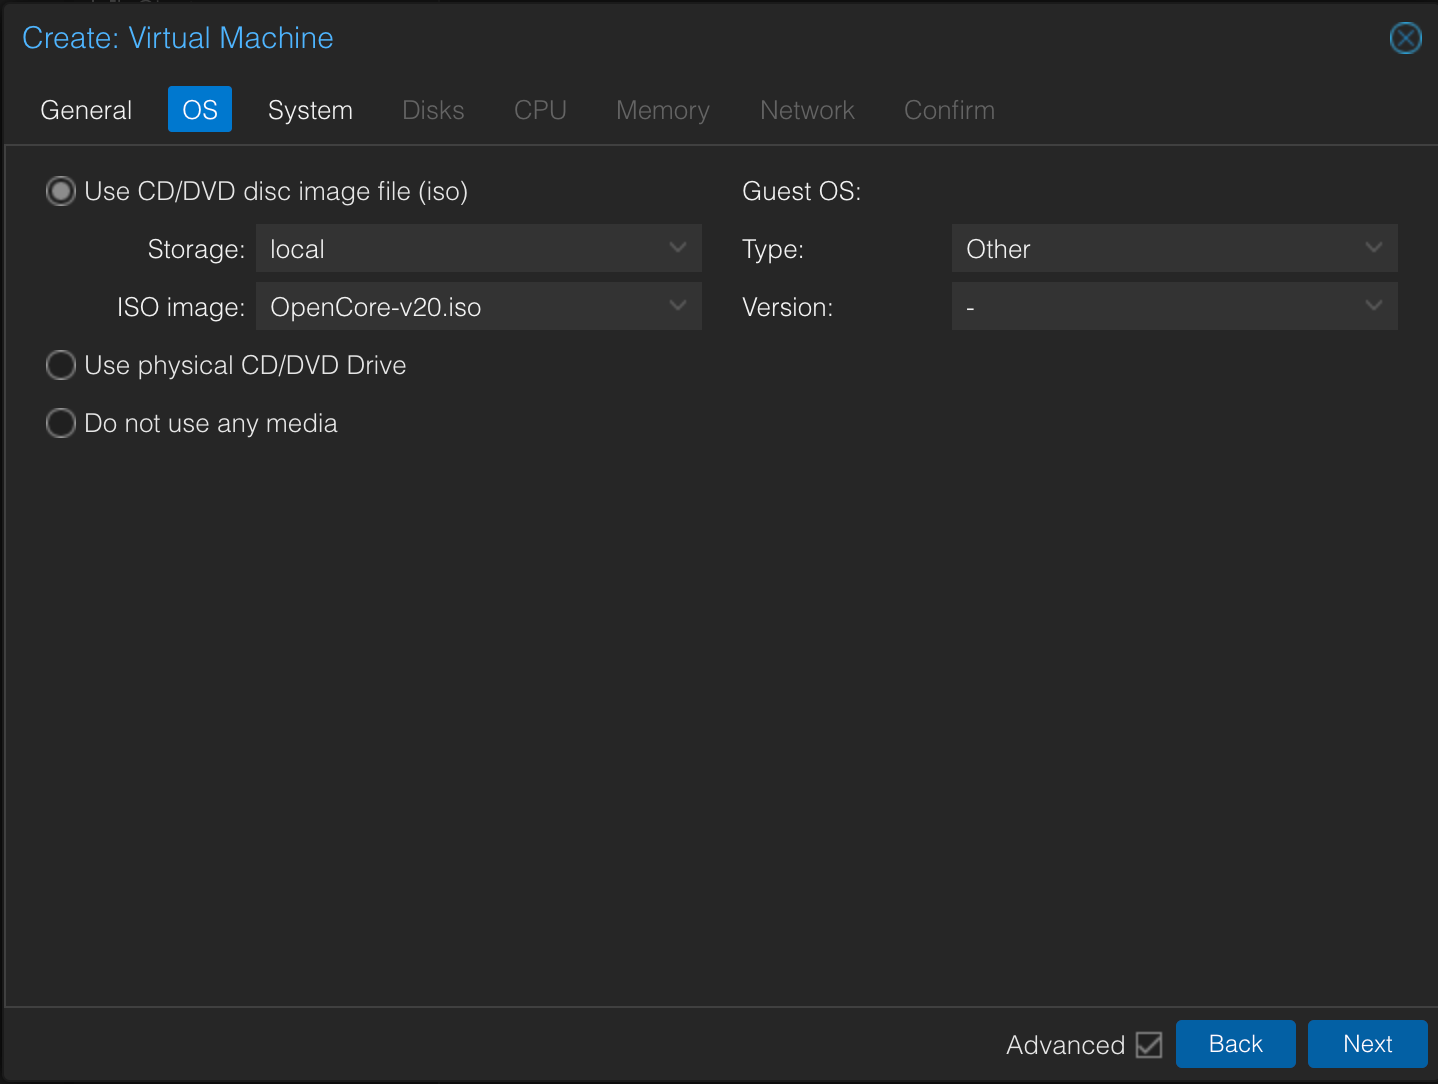
On the next screen, you will choose the OpenCorev20.iso image that you uploaded. Then choose Other for OS Type. Then click Next.
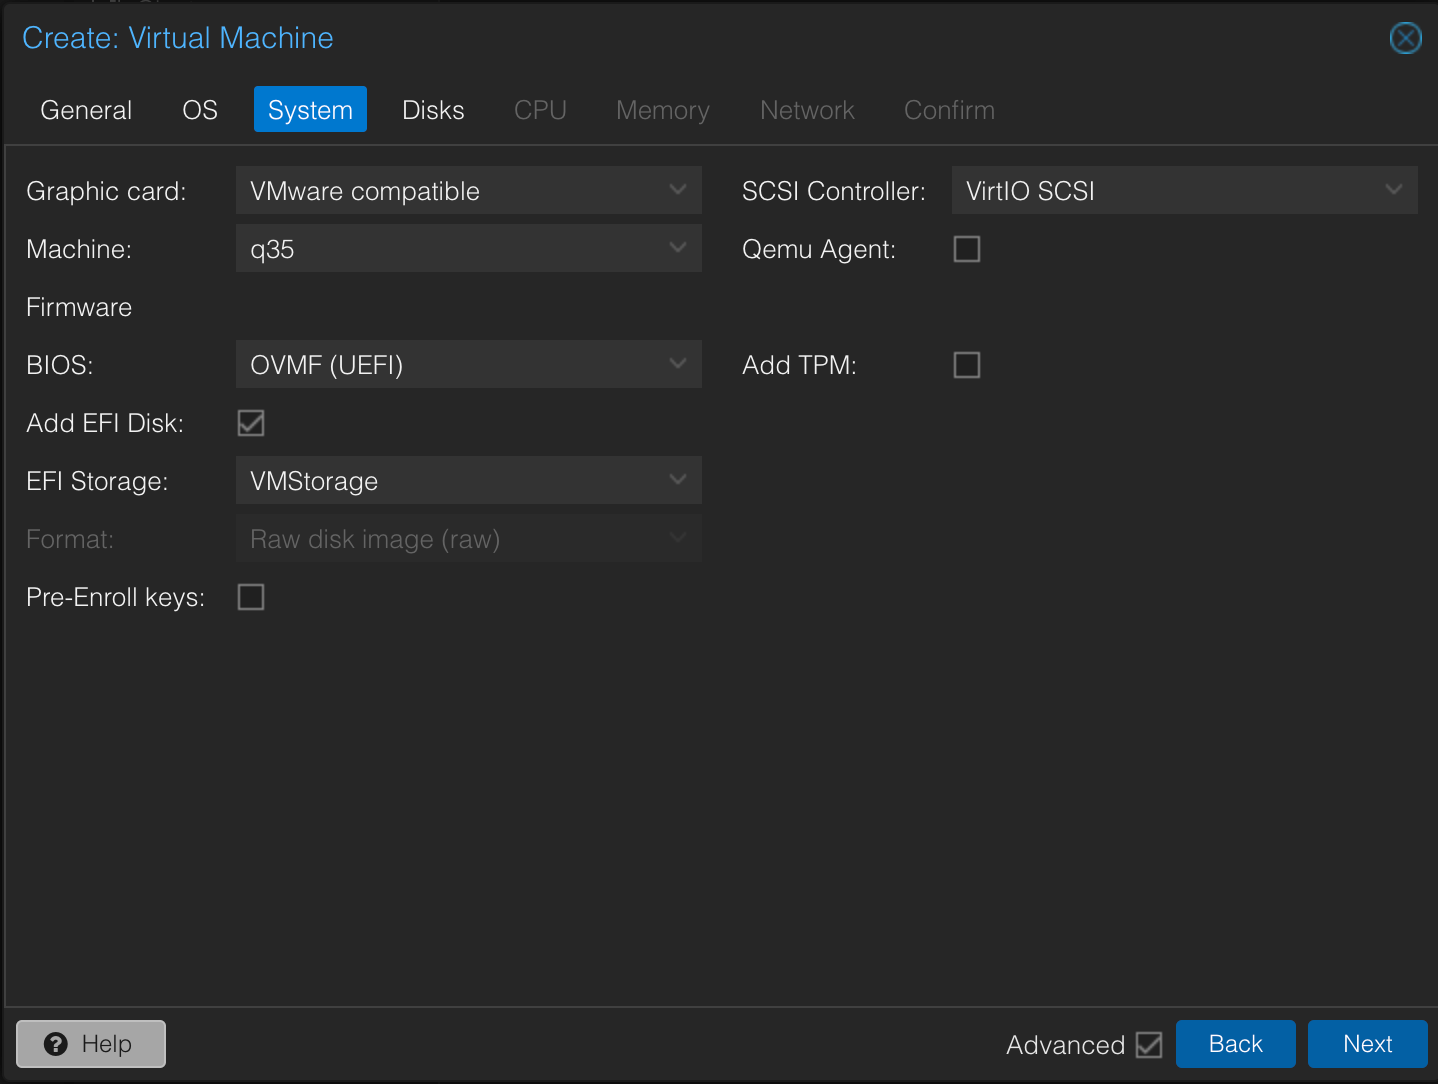
On the next screen you will choose VMWare compatible for Graphics Card. Machine type will be q35. The BIOS should be OVMF (UEFI). Next, check the box for Add EFI Disk. Choose the storage where you would like that saved. Then for SCSI Controller, choose VirtIO SCSI. Then click Next.
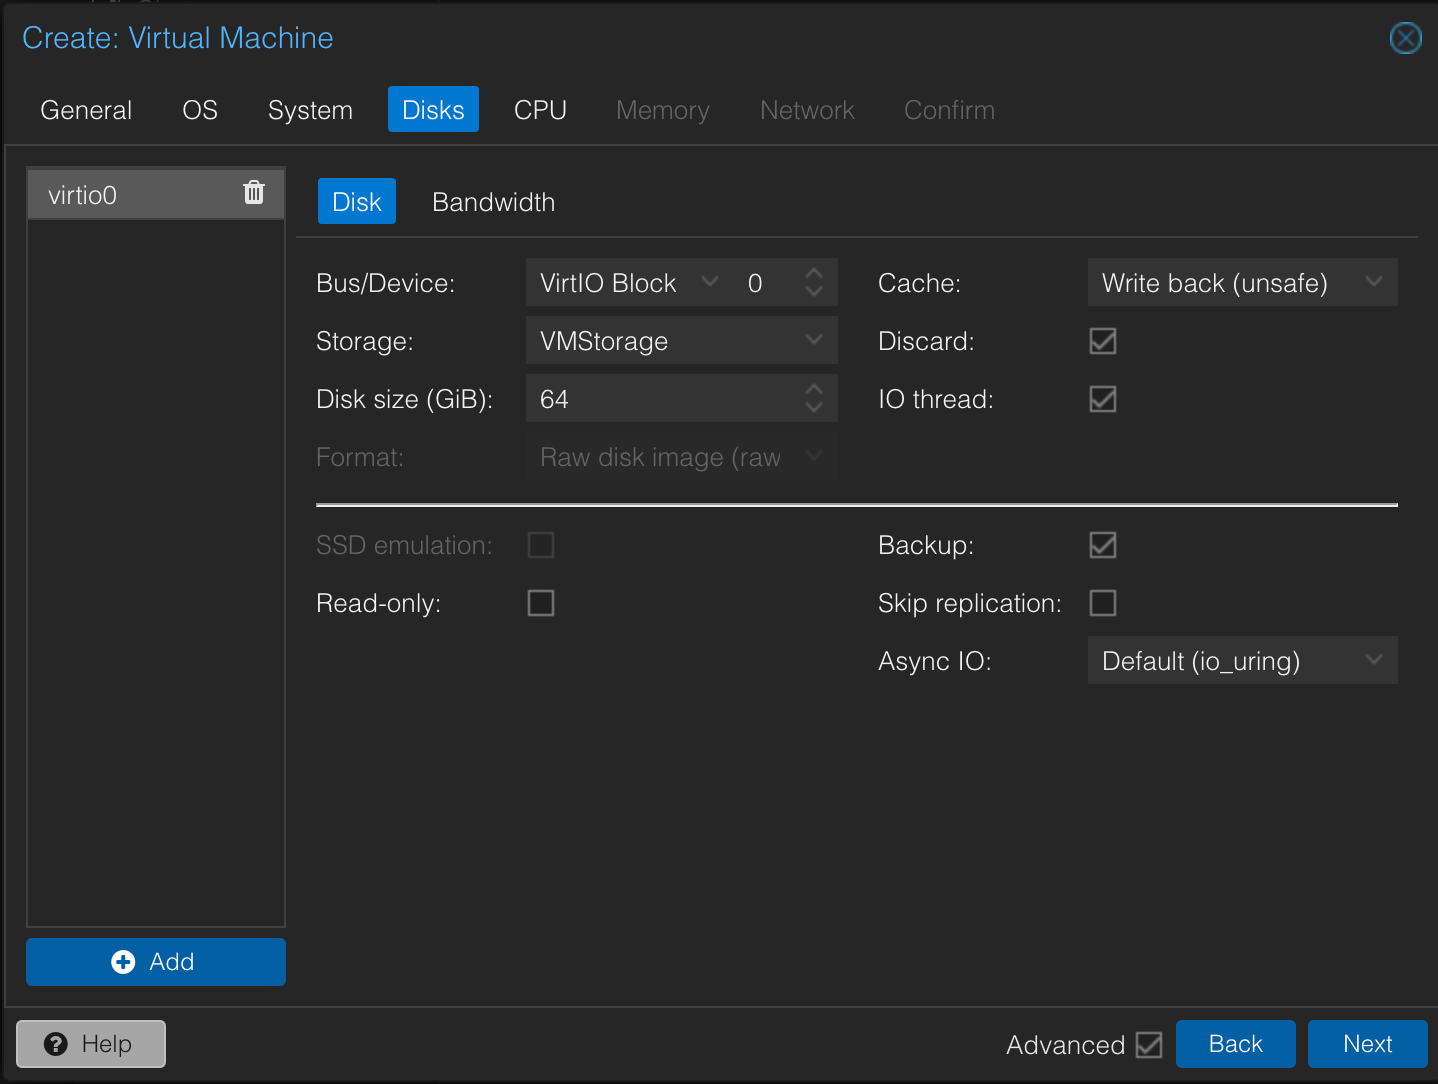
On the Disks screen, set the Bus/Device to VirtIO Block and set the storage to 64GB or more depending on how much space you would like. Next set the Cache to Write back (unsafe). Finally, if you are running this VM on ZFS make sure that the Discard box has been checked. If you are NOT using ZFS, then leaved the box unchecked. Then click Next.
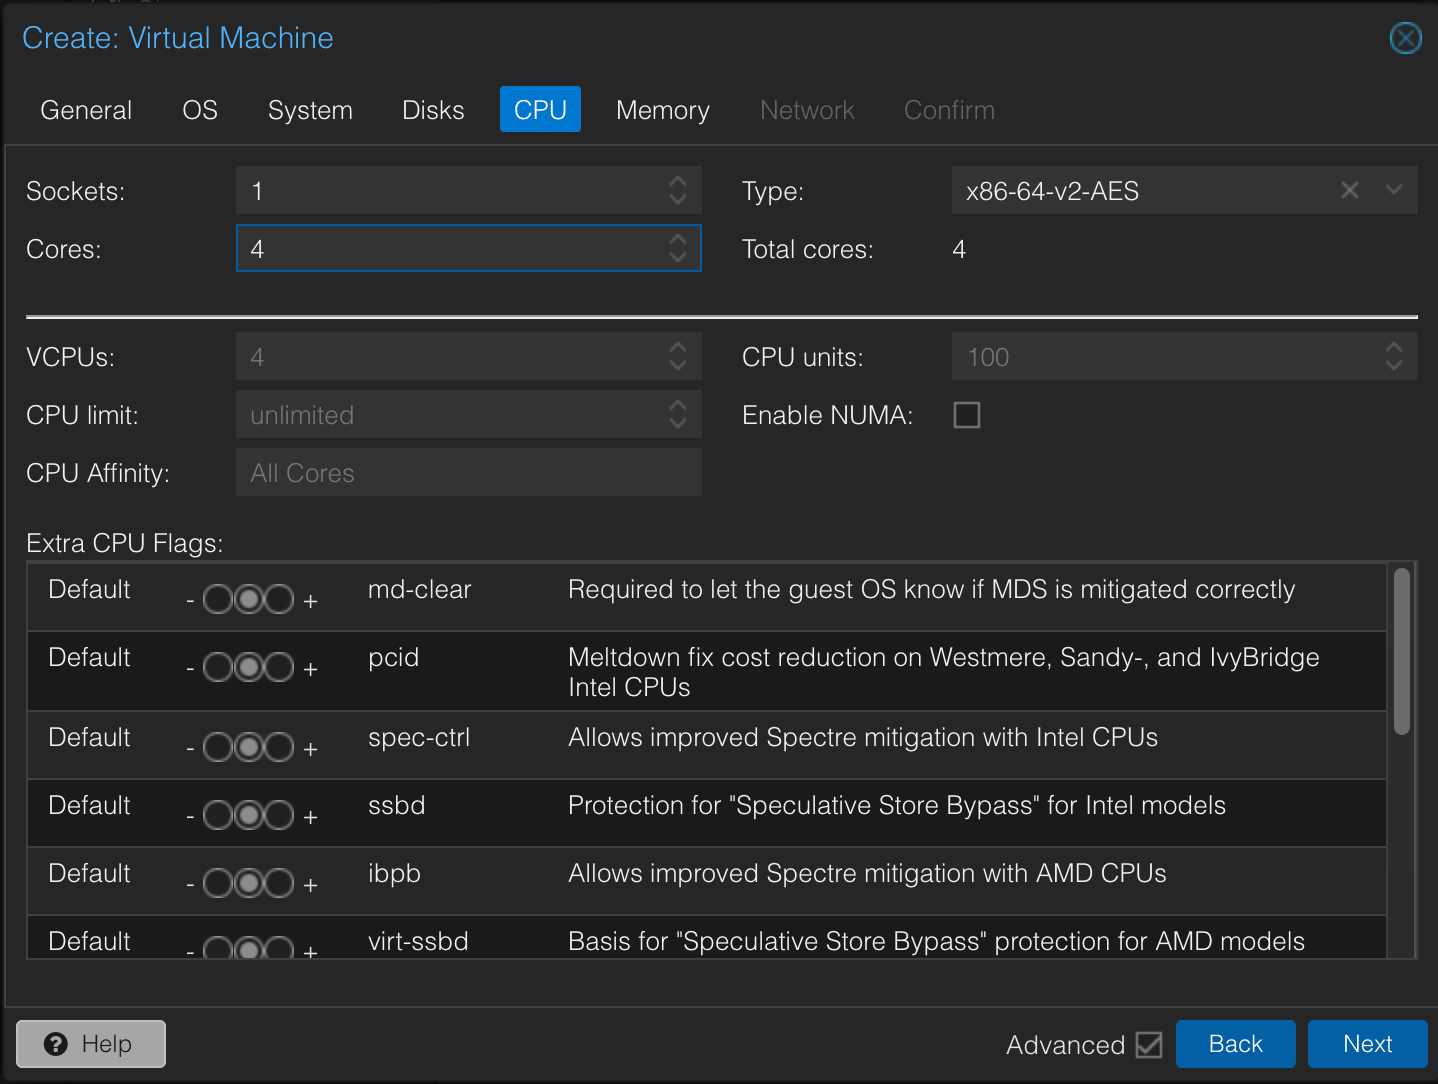
On the CPU screen, choose 4 on the Cores section. Then click Next.
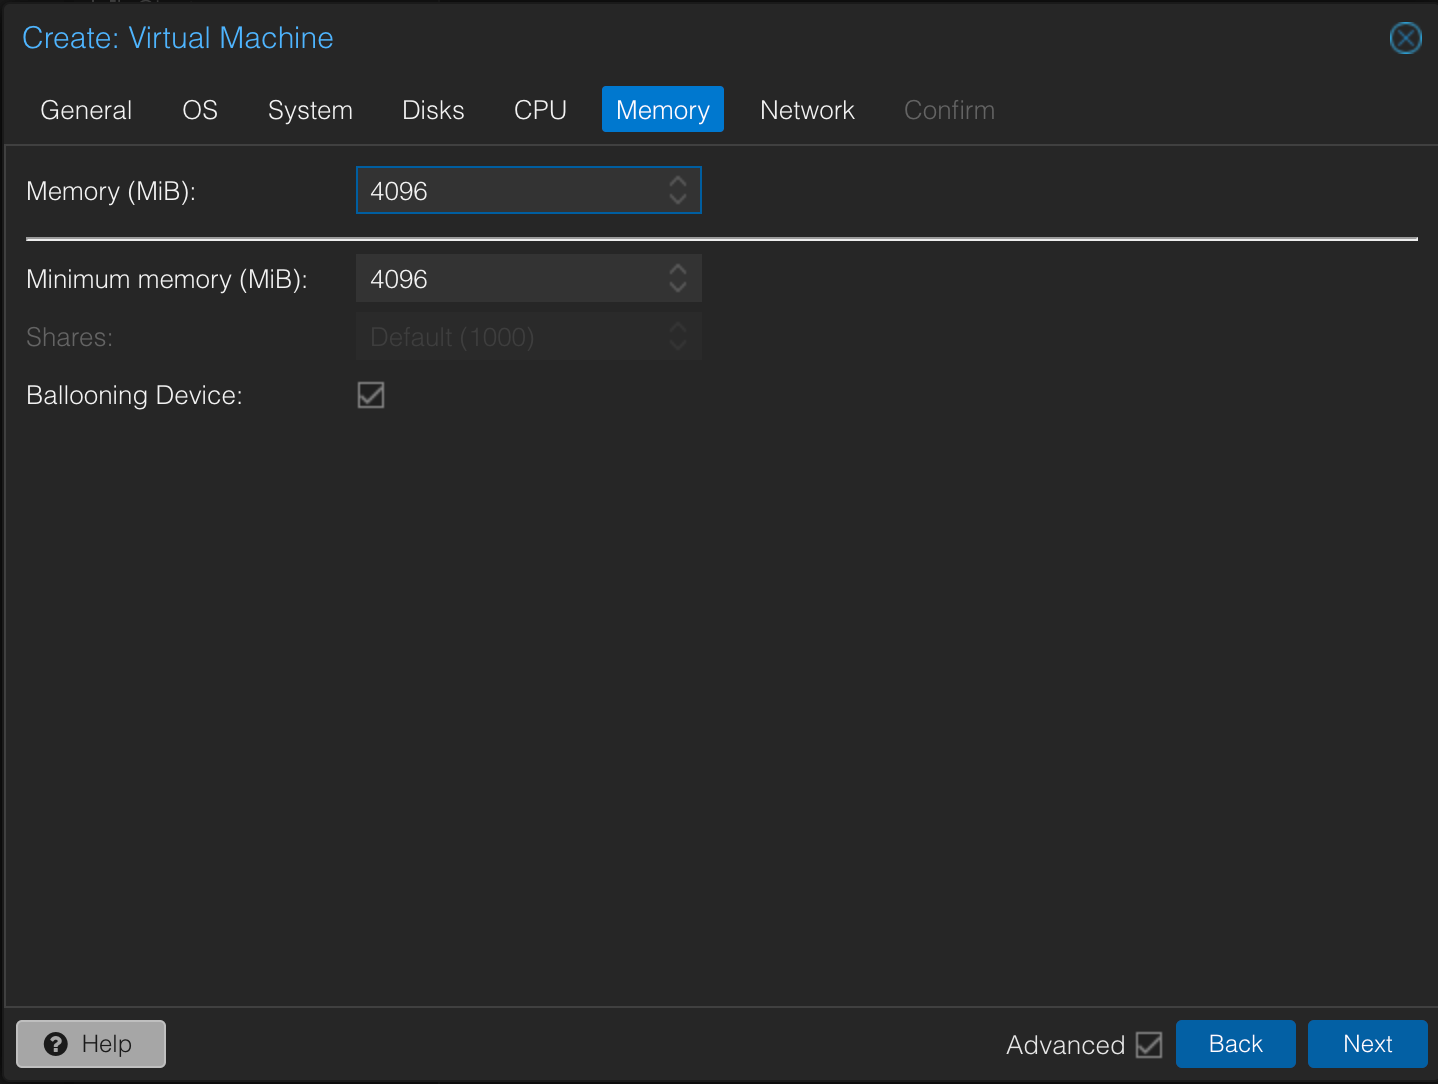
On the Memory screen, set the amount in Megabytes to 4096. Then click Next.
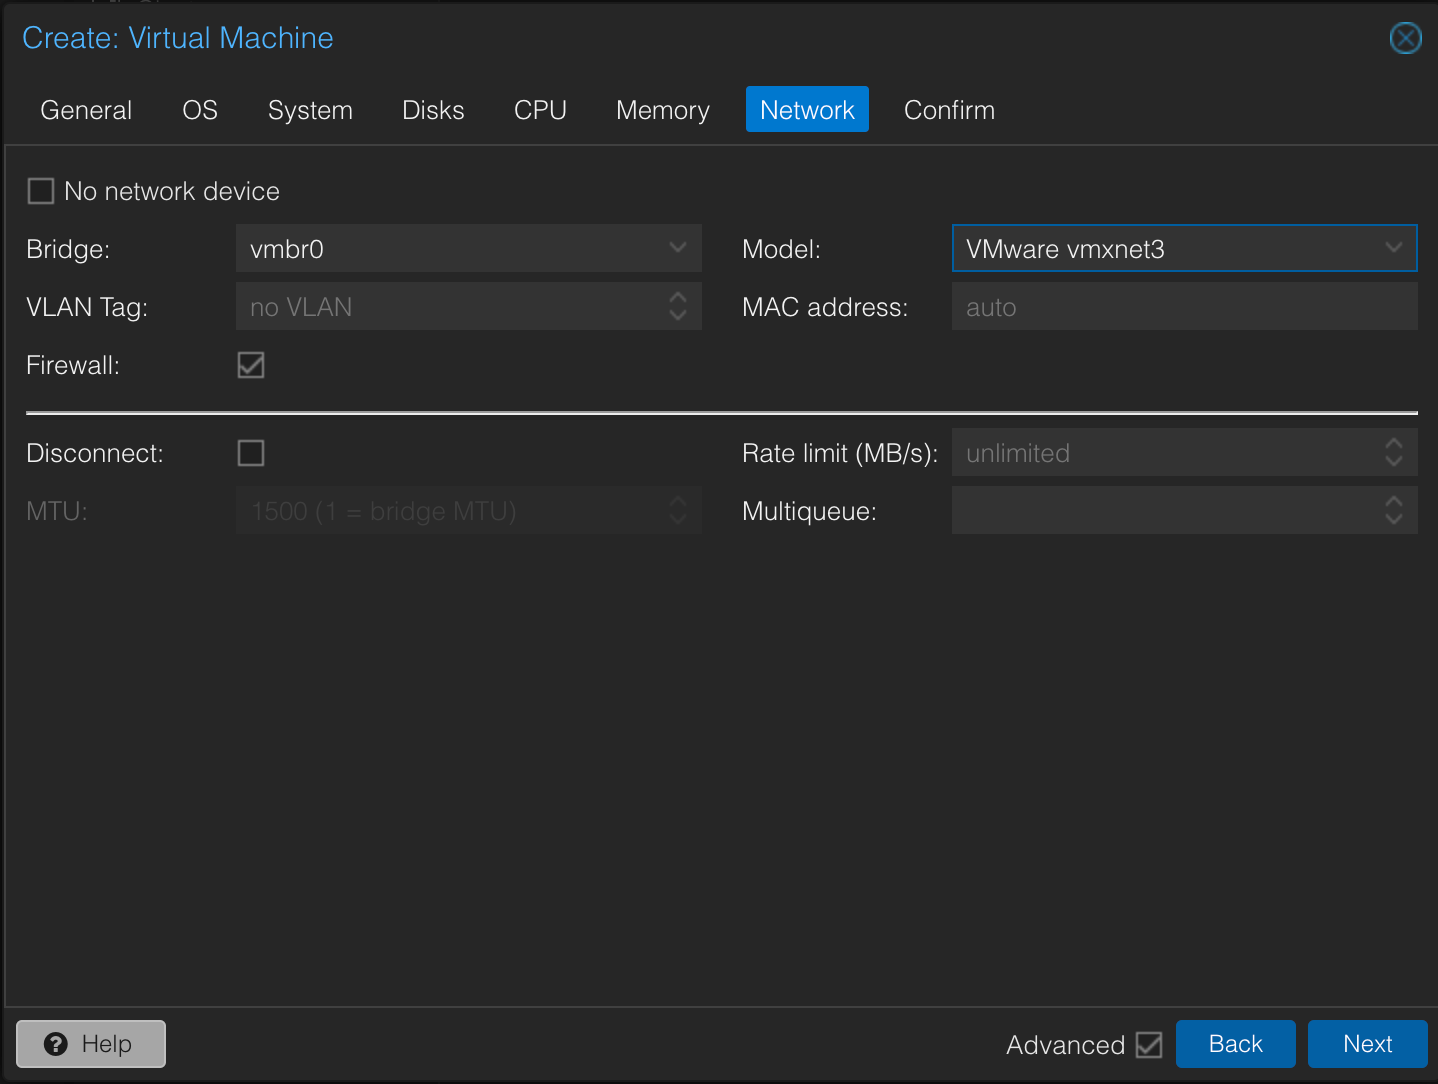
On the Network tab, choose VMware vmxnet3 for the Model. Then click next.
At this point you can choose to finish the VM setup. Make sure the option to start the VM is UNCHECKED as we do not want the VM to start yet. There are a few hardware changes we need to make first.
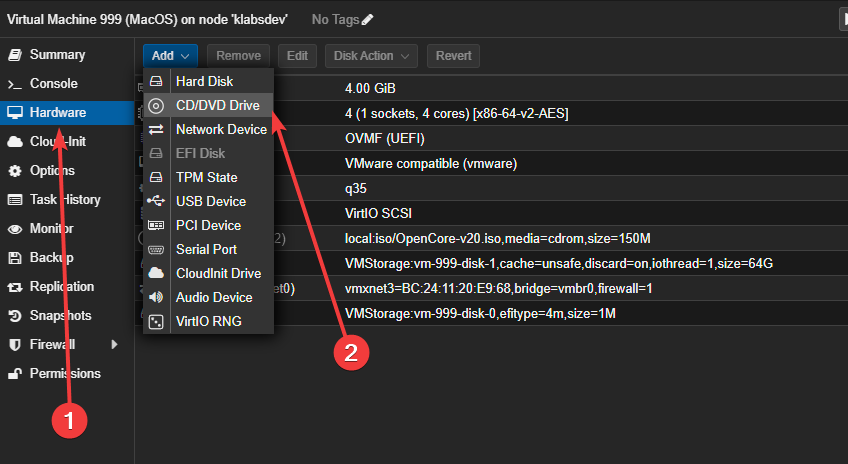
Step 4) Next, we need to attach our MacOS image/ISO file we made to the VM. To do this simply navigate to the hardware tab and click the "Add" button at the top and choose "CD/DVD Drive".
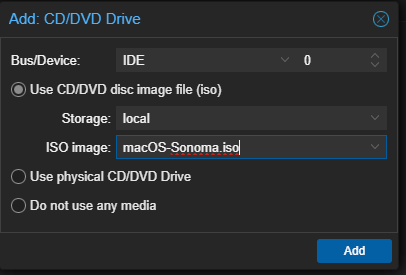
Then choose the macOS image you have uploaded! Click "Add".
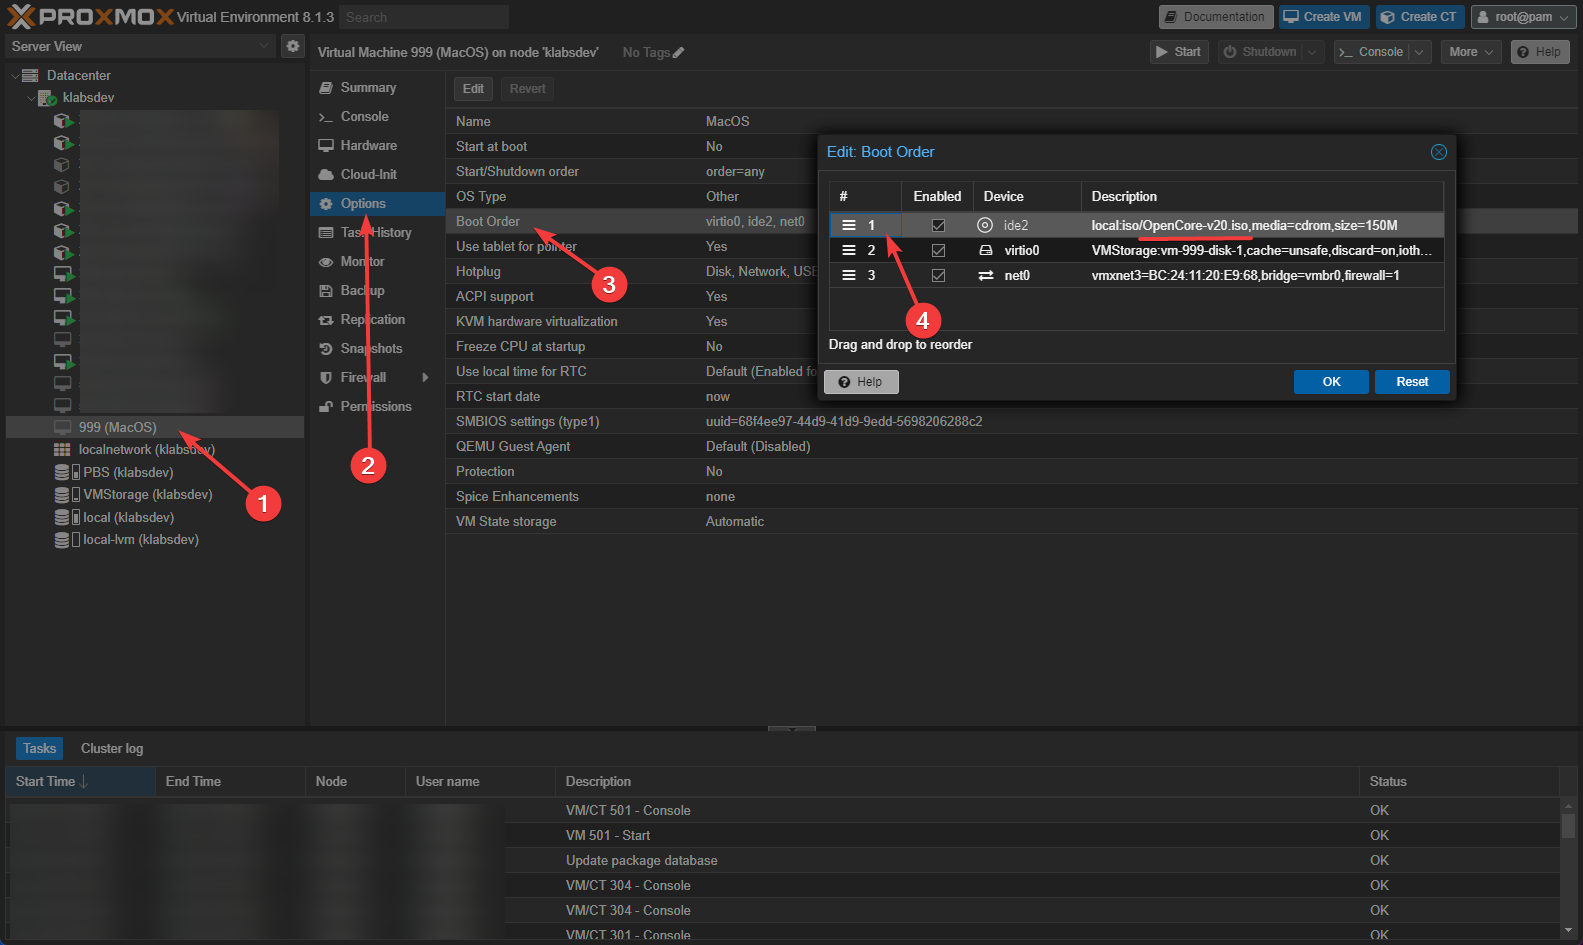
Step 5) Next, click on you MacOS VM to select it. Then navigate to Options -> Boot Order. We need to make sure that OpenCore.iso is set to the first option in the boot order.
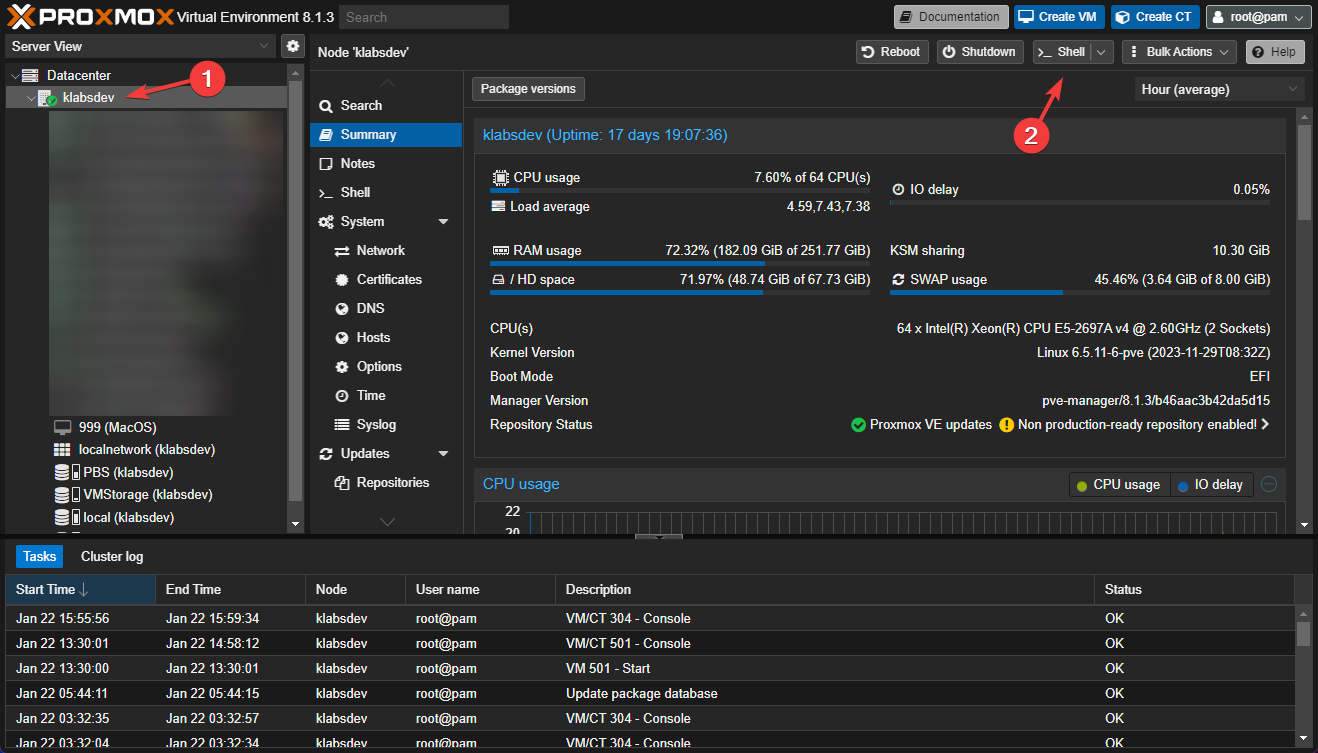
Step 6) Now we will need to manually add some arguments to the end of the VM .conf file. To do this you will need to enter the Proxmox Host console. Do this by clicking on your node and clicking Shell at the top right corner.
After the console has been opened, you can edit the VM config file with the following command: Change VMIDHERE with the ID number from you MacOS VM. In this example I am using 999.
nano /etc/pve/qemu-server/VMIDHERE.confOnce, the file has been opened, go to the bottom of the file and add the following:
FOR INTEL HOSTS:
args: -device isa-applesmc,osk="ourhardworkbythesewordsguardedpleasedontsteal(c)AppleComputerInc" -smbios type=2 -device usb-kbd,bus=ehci.0,port=2 -global nec-usb-xhci.msi=off -global ICH9-LPC.acpi-pci-hotplug-with-bridge-support=off -cpu host,vendor=GenuineIntel,+invtsc,+hypervisor,kvm=on,vmware-cpuid-freq=onFOR AMD HOSTS:
args: -device isa-applesmc,osk="ourhardworkbythesewordsguardedpleasedontsteal(c)AppleComputerInc" -smbios type=2 -device usb-kbd,bus=ehci.0,port=2 -global nec-usb-xhci.msi=off -global ICH9-LPC.acpi-pci-hotplug-with-bridge-support=off -cpu Haswell-noTSX,vendor=GenuineIntel,+invtsc,+hypervisor,kvm=on,vmware-cpuid-freq=onYou will also need to edit the 2 lines with the config regarding the CDROM drives that are mounting the OpenCore and MacOS ISO images. You will need to remove ,media=cdrom and add cache=unsafe. The lines should look like this:
ide0: local:iso/macOS-Sonoma.iso,size=14450M,cache=unsafe
ide2: local:iso/OpenCore-v20.iso,size=150M,cache=unsafePress CTRL + X then Y then ENTER to save the changes.
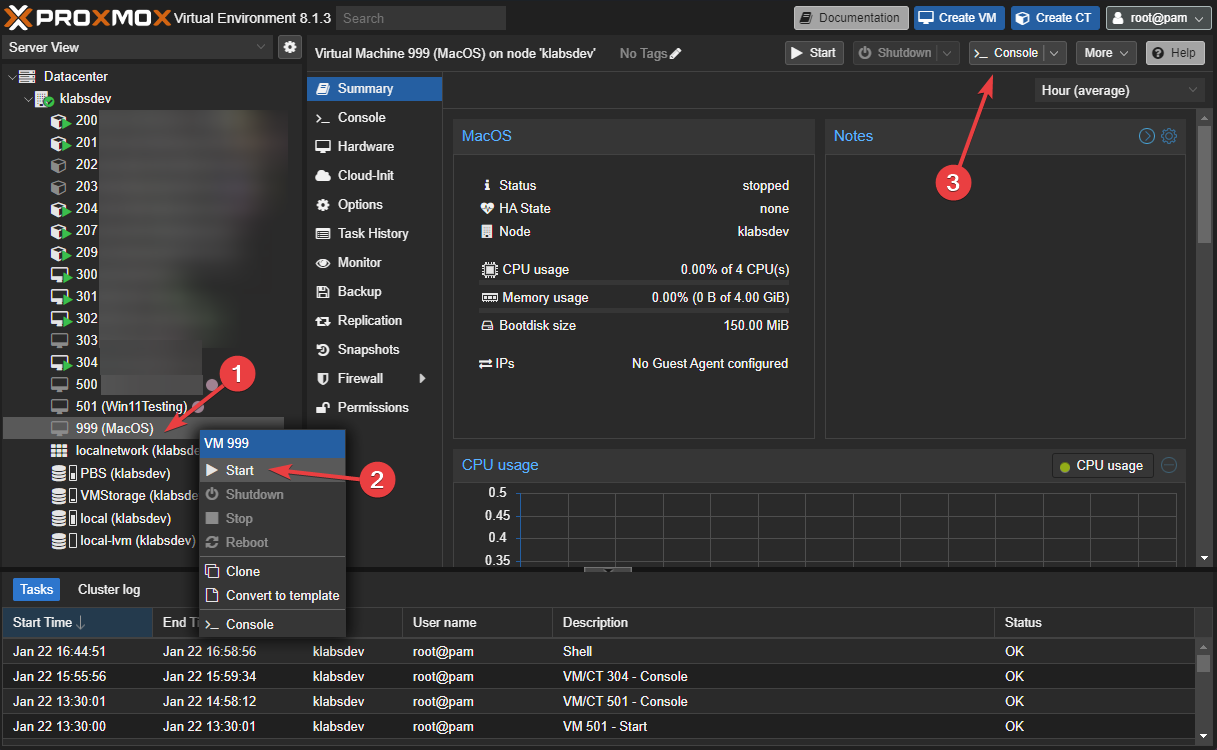
Step 7) Finally, we can start up the VM! Right click on the VM and click Start. After this click on the console button on the top right of the screen.
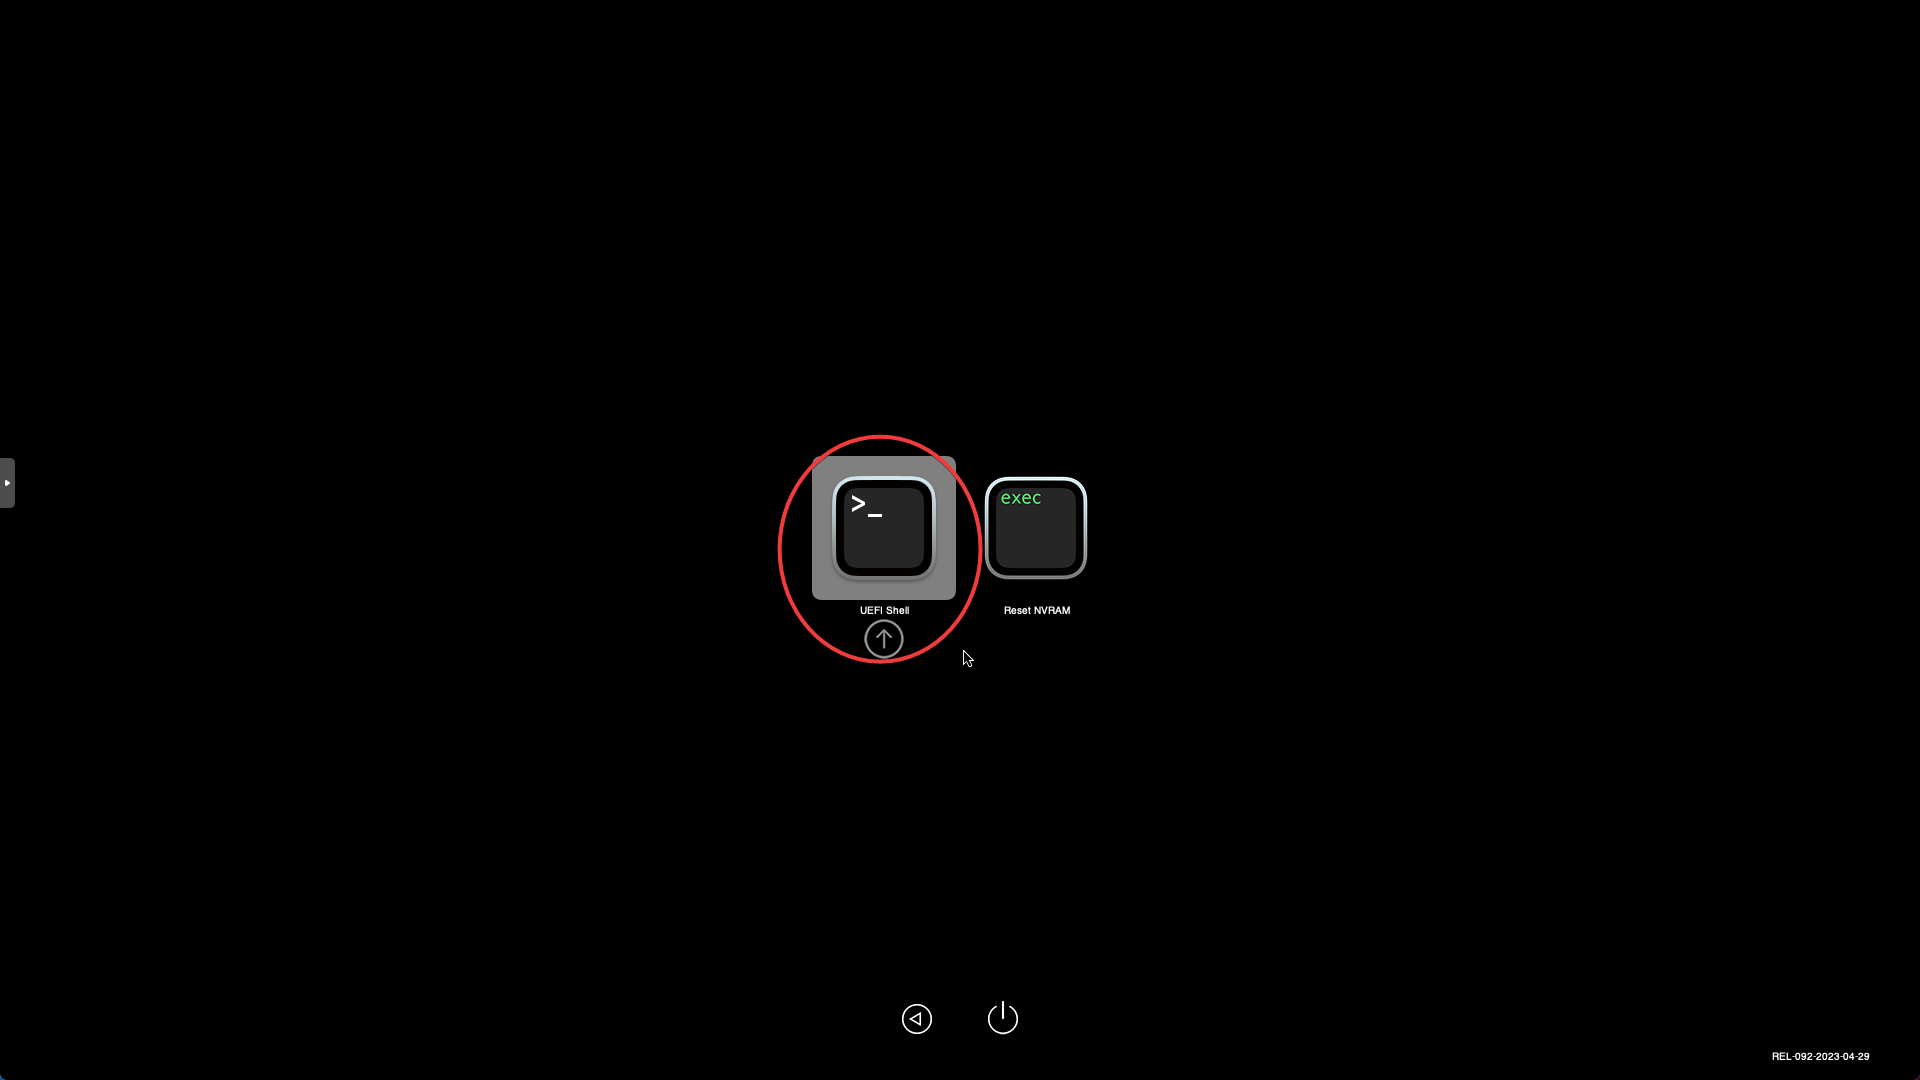
Once the console window has been opened, press ENTER to open the UEFI Shell.
Mount the UEFI location by typing:
fs0:Then we can run the UEFI boot file by typing:
System\Library\CoreServices\boot.efi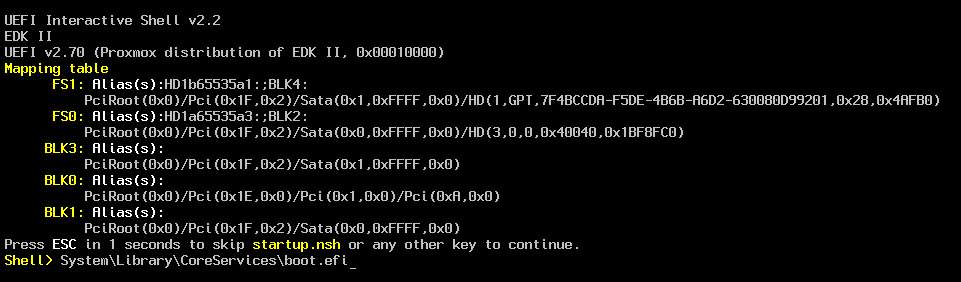
After a while, you will boot into MacOS Recovery.
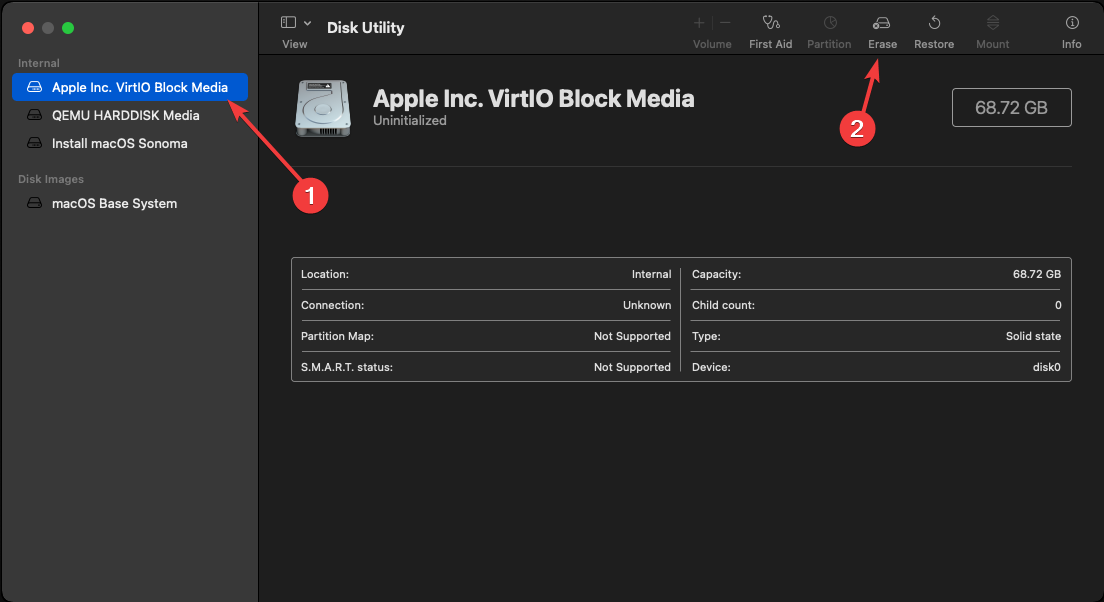
Step 8) Once booted into MacOS Recovery, choose "Disk Utility". From the Disk Utility window you will need to select VirtIO Block Media and Erase the disk.
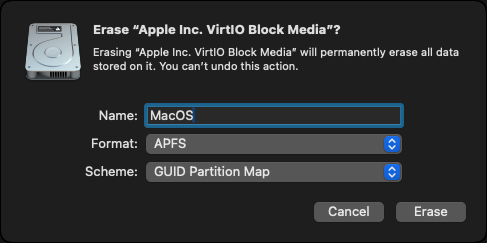
A new window will open. Choose MacOS for Name, APFS for Format, and GUID Partition Map for Scheme. One set, click "Erase". Once this has finished, click "Done". Finally, you can close the Disk Utility window.
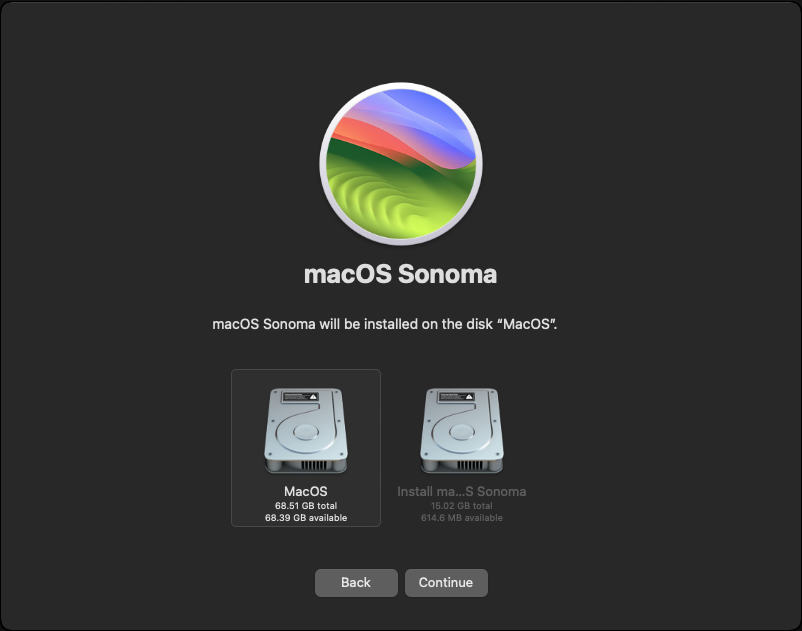
Step 9) Once the Disk Utility window has been closed, choose the "Install macOS Sonoma" option. Follow the next few window prompts. When you get to a screen asking what disk to install MacOS to, choose the "MacOS Drive" we formatted before. Then click continue.
After some time, the data will be written to the drive MacOS will be booting from. The system will reboot a few times. Choose "macOS Installer" if brought back to the UEFI screen.

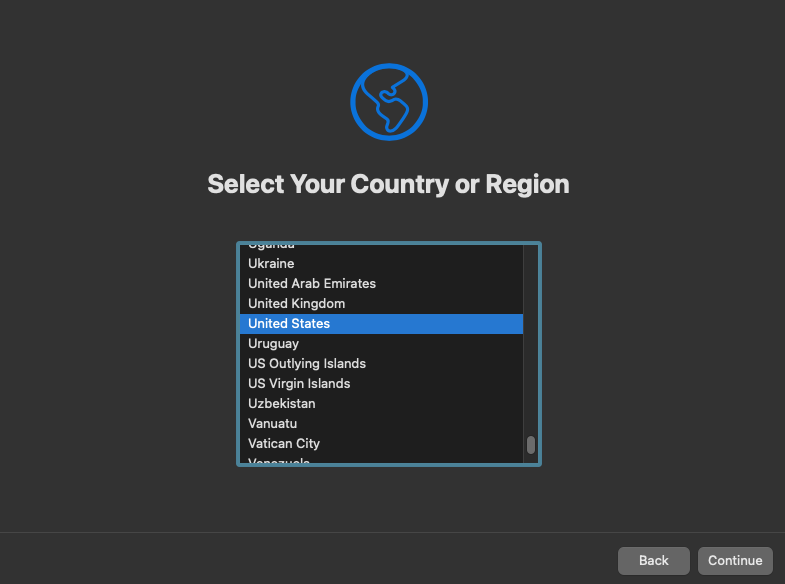
Step 10) After doing this a few times, you will eventually end up at a Region selection screen. Choose your Region. Click Continue.
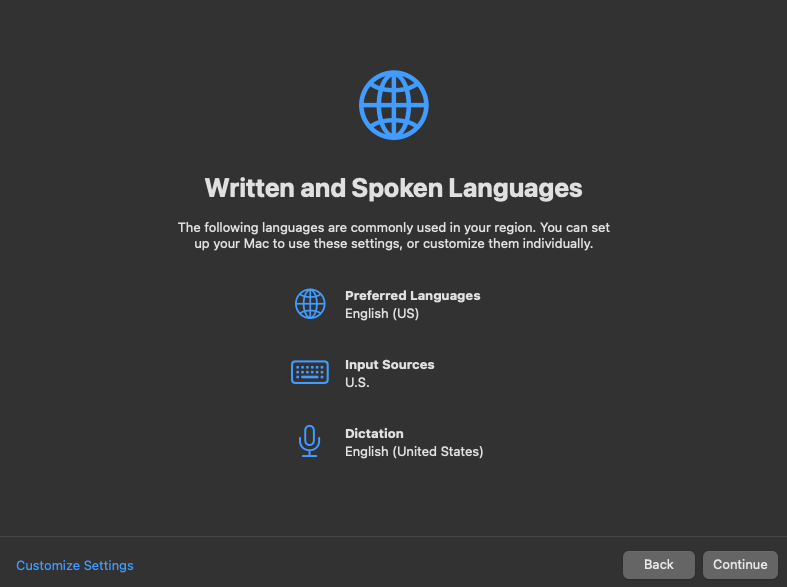
Next, click continue if your Preferred languages, Input Sources, and Dictation is correct. Click Continue.
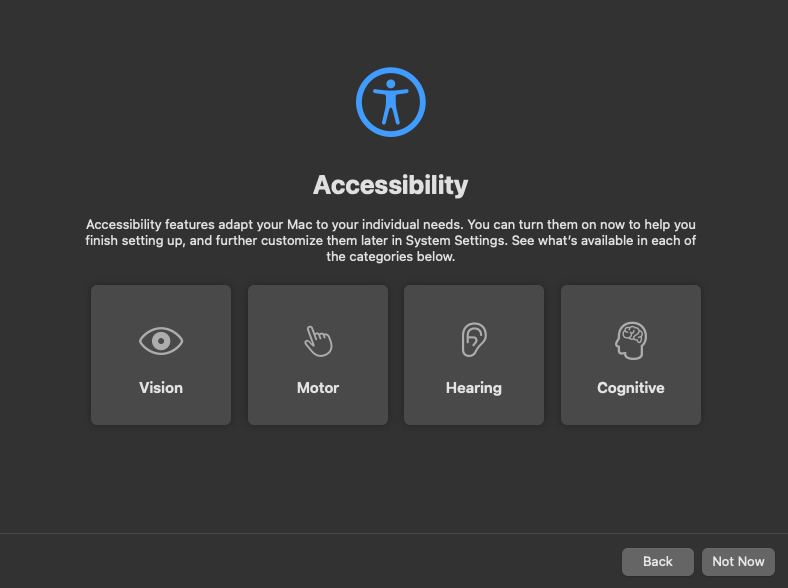
Choose "Not Now" on the Accessibility screen.
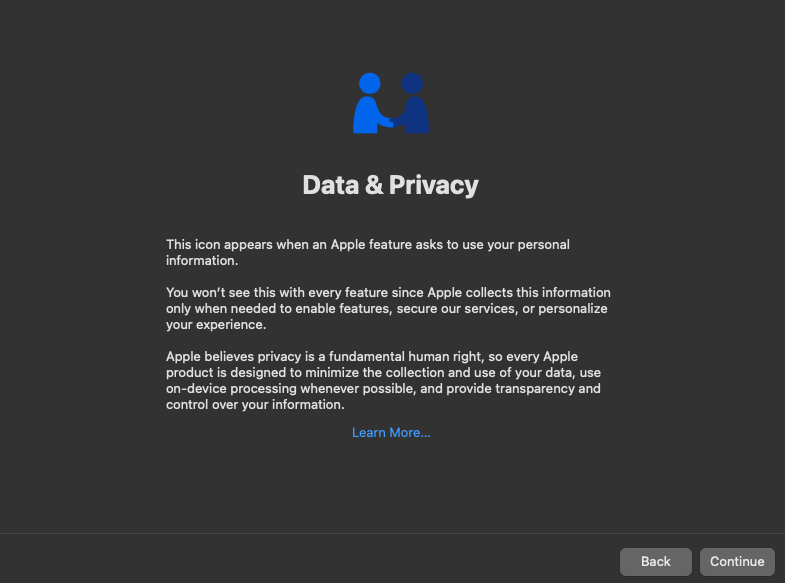
Click Continue on the "Data & Privacy" screen.
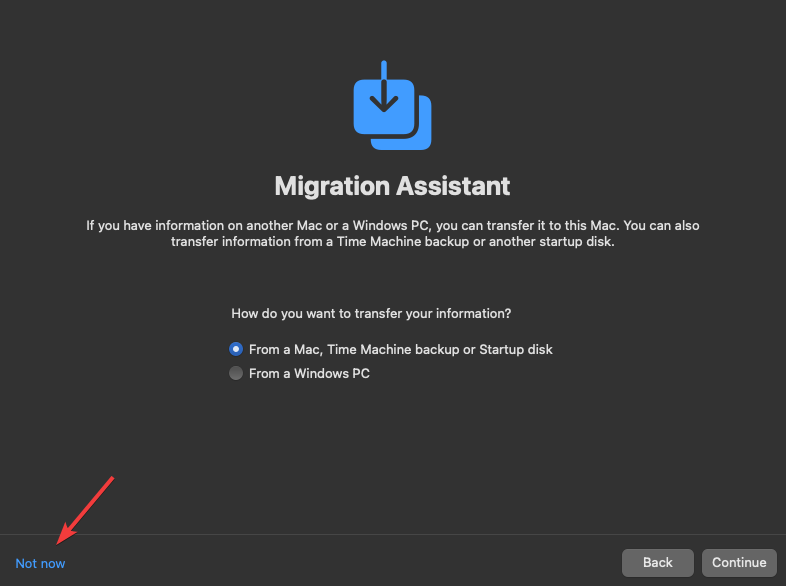
Make sure to choose "Not Now" on the Migration Assistant screen.
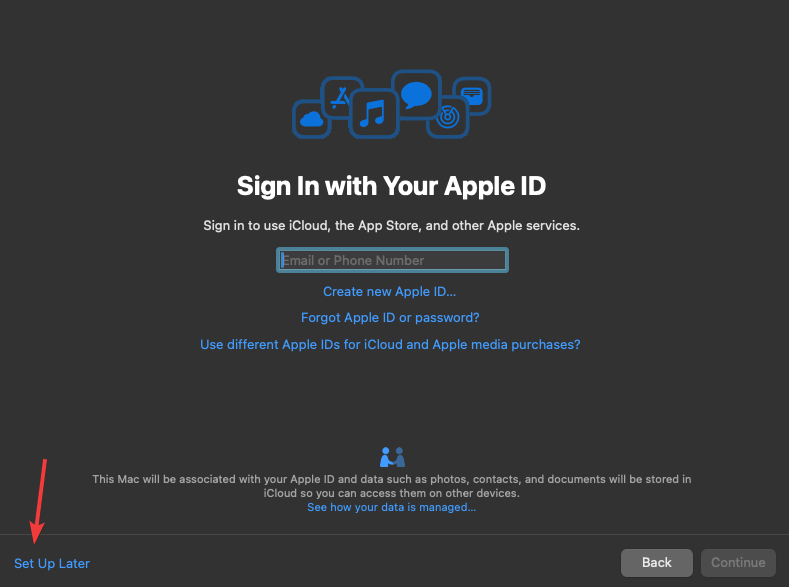
Finally, choose "Set Up Later" when asked to Sign in with your Apple ID.
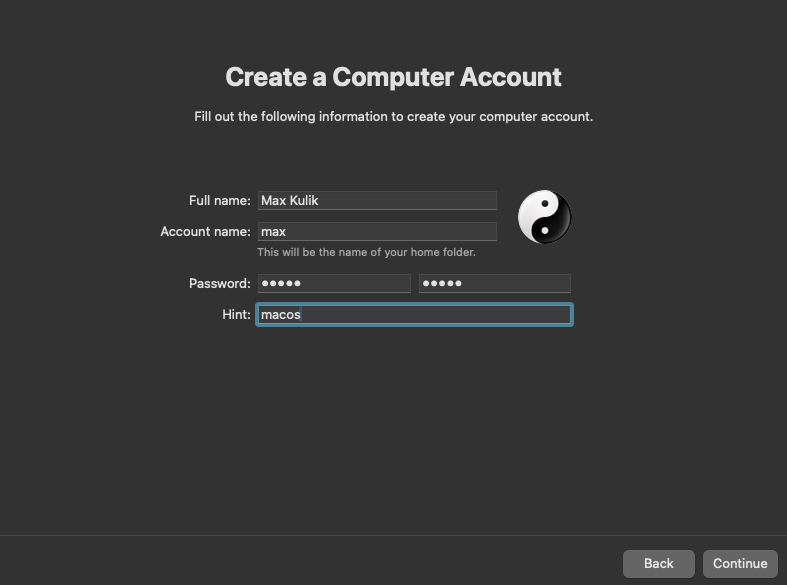
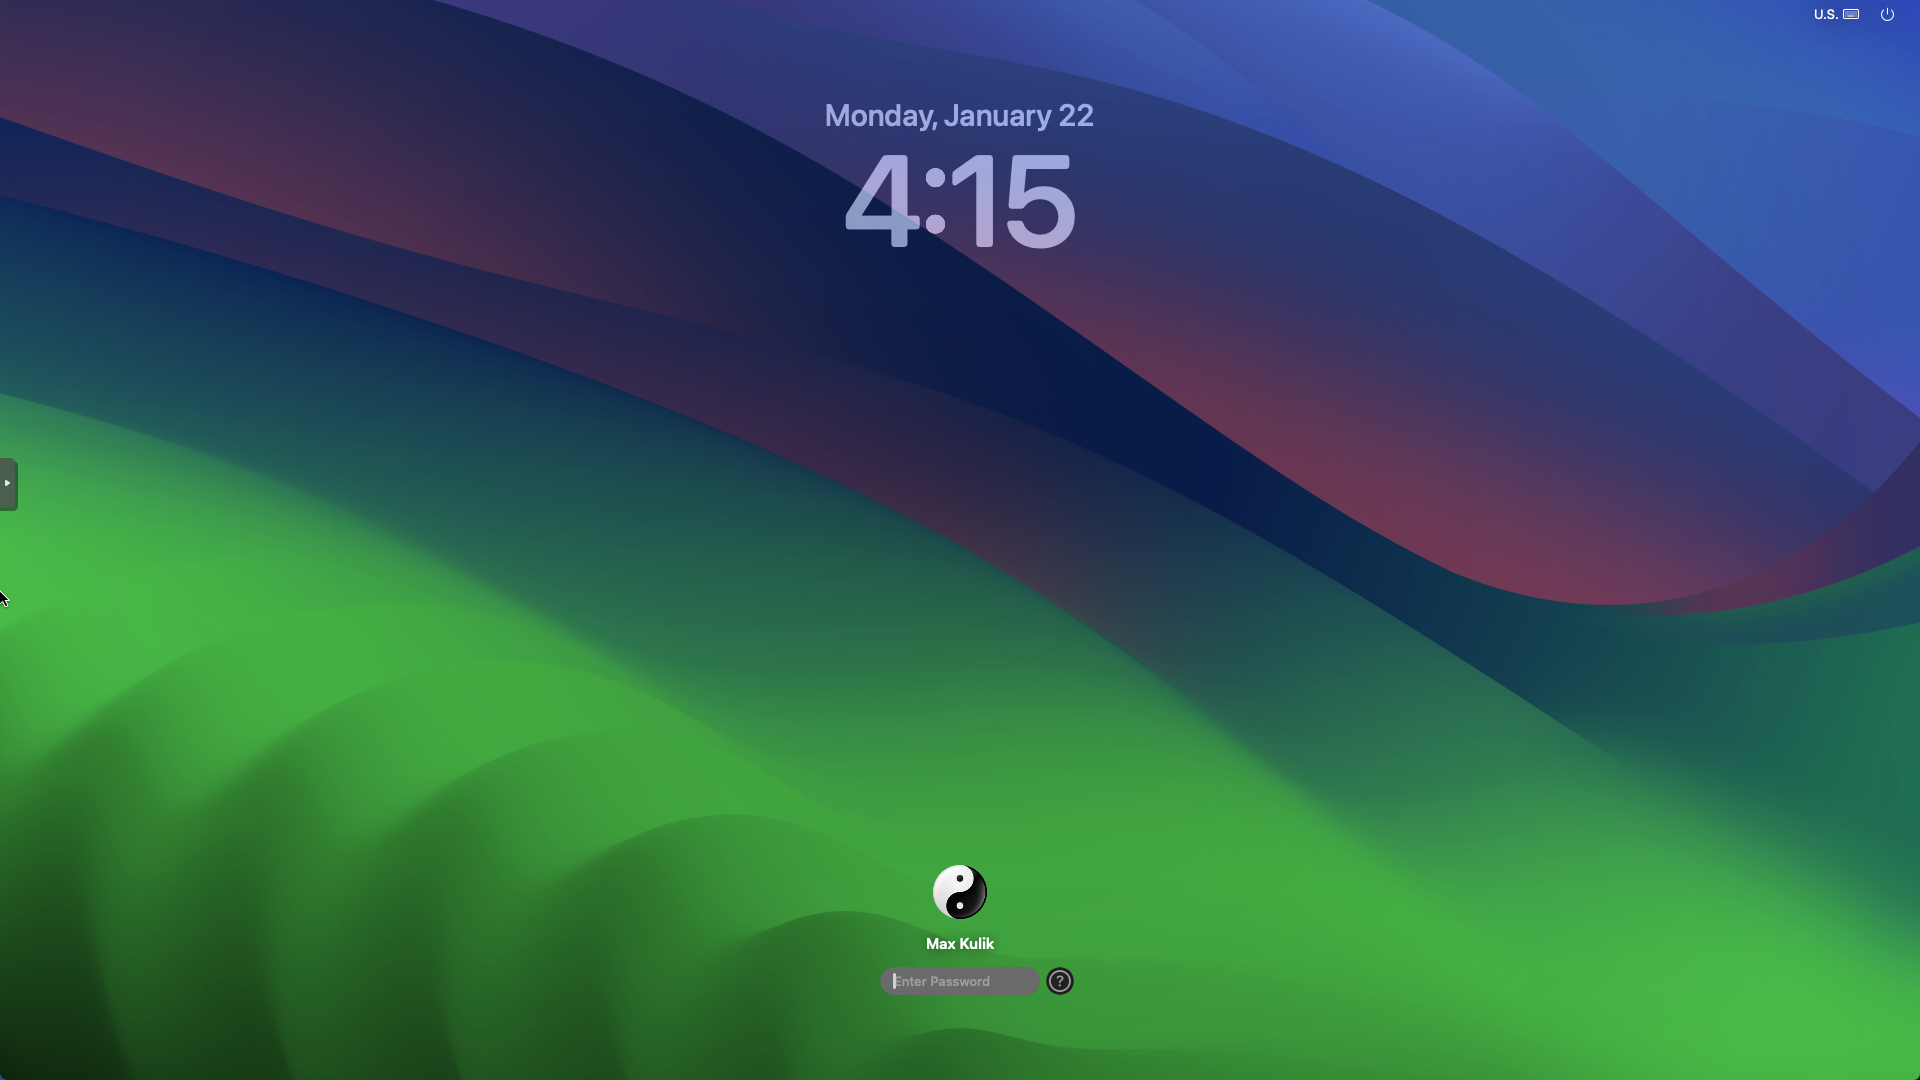
Lastly, you'll need to create your local account. Your VM will take a few moments to load into the desktop.
Welcome to your MacOS VM running in Proxmox
Boot MacOS W/out OpenCore
With the current configuration you will still need manually select MacOS when booting the VM. We can fix this by fixing the EFI partition.
Step 1) Log into your MacOS VM and open a web browser and download the KVM OpenCore EFI folder.
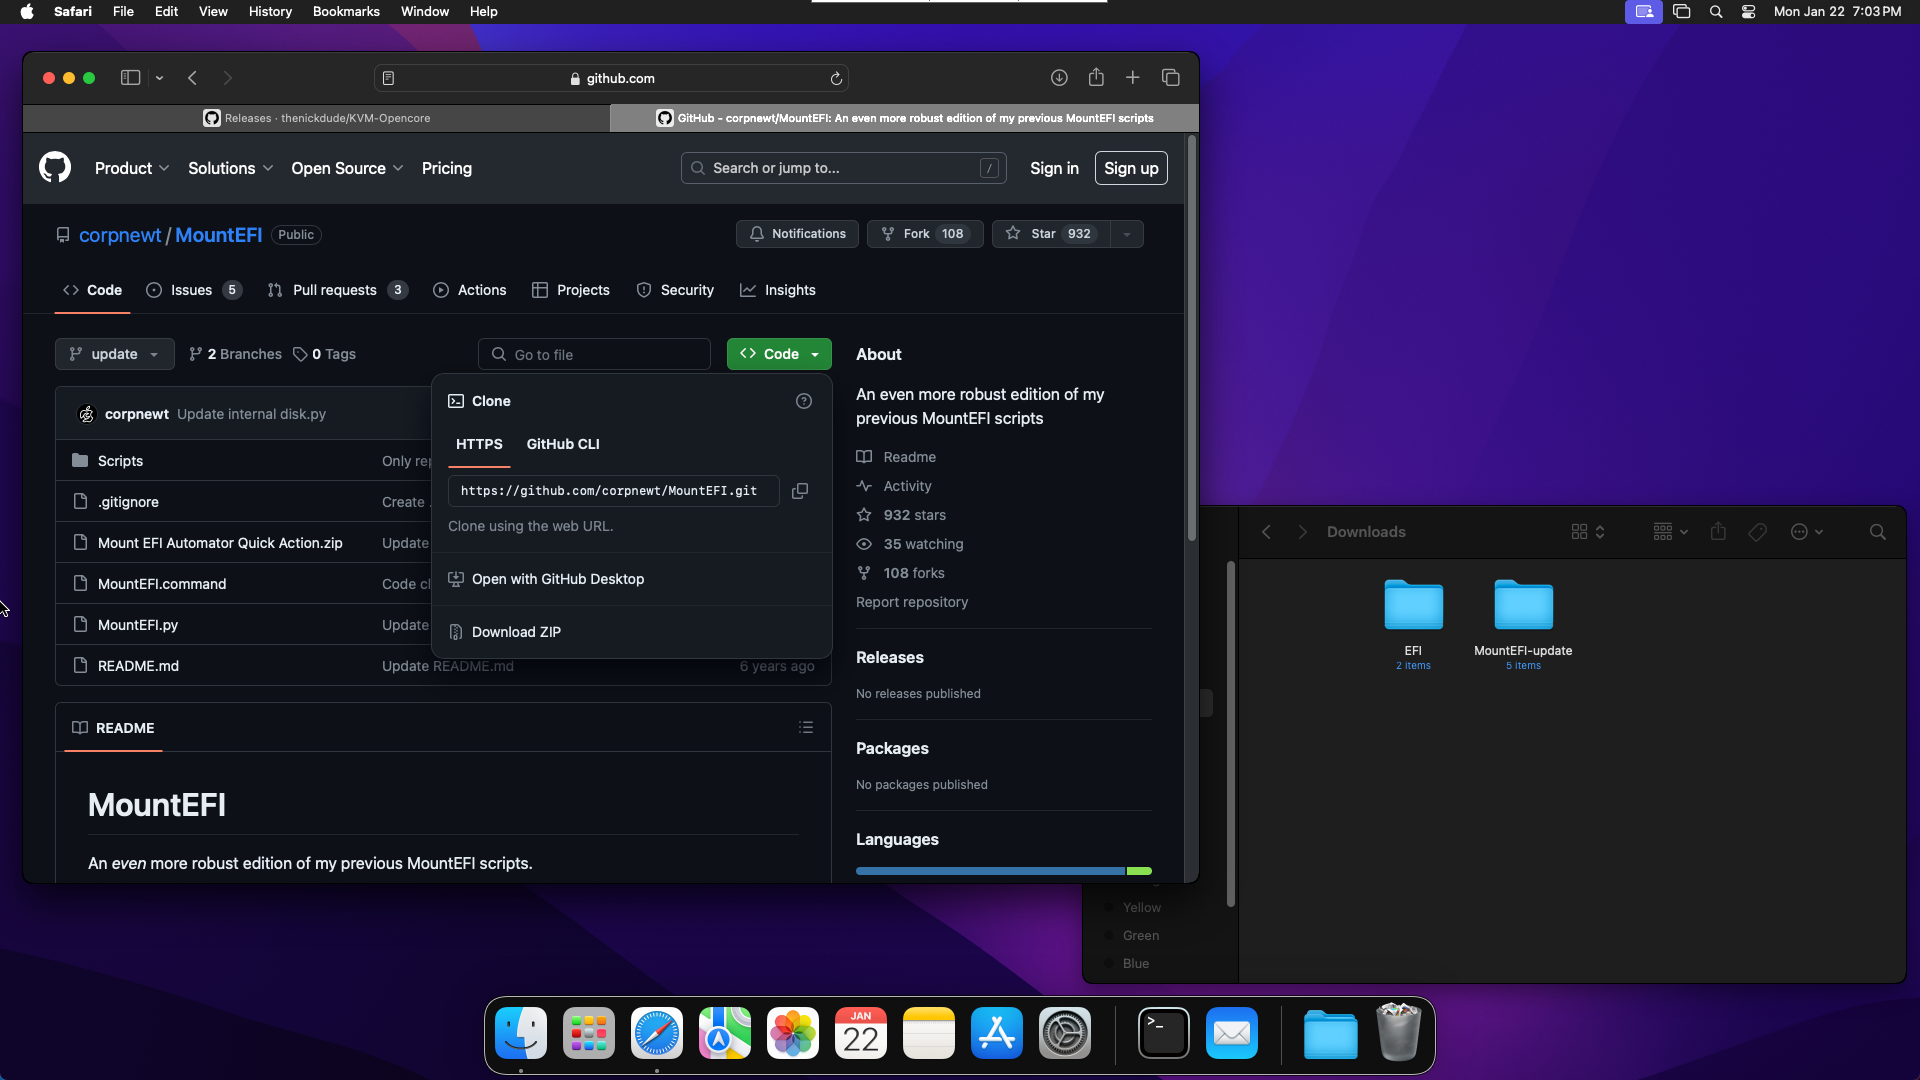
Step 2) Next, we also need to download MountEFI from Github as well.
Step 3) Once both things are downloaded we'll start setting up the proper EFI. Open a terminal window and enter:
cd ~/Downloads/MountEFI-updatechmod +x MountEFI.command./MountEFI.commandStep 4) In the terminal screen that opens, choose the number that matches the drive you created when installing MacOS. In my case, it's #1.
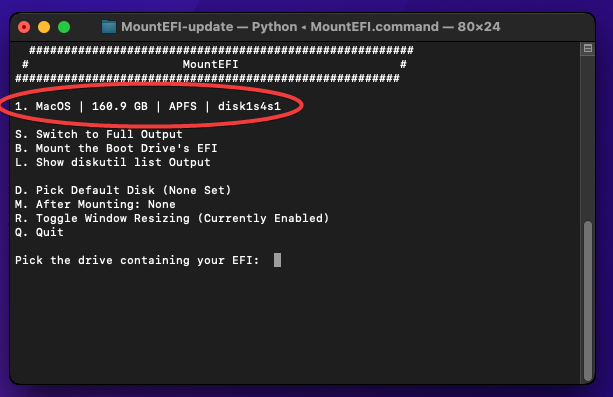
After hitting enter on the drive, you will be asked to enter the password for your account.
Step 5) Next open a Finder window. Open the EFI drive that has just been mounted from the left-hand panel. If there is a folder in there called EFI, rename it to EFI.orig.
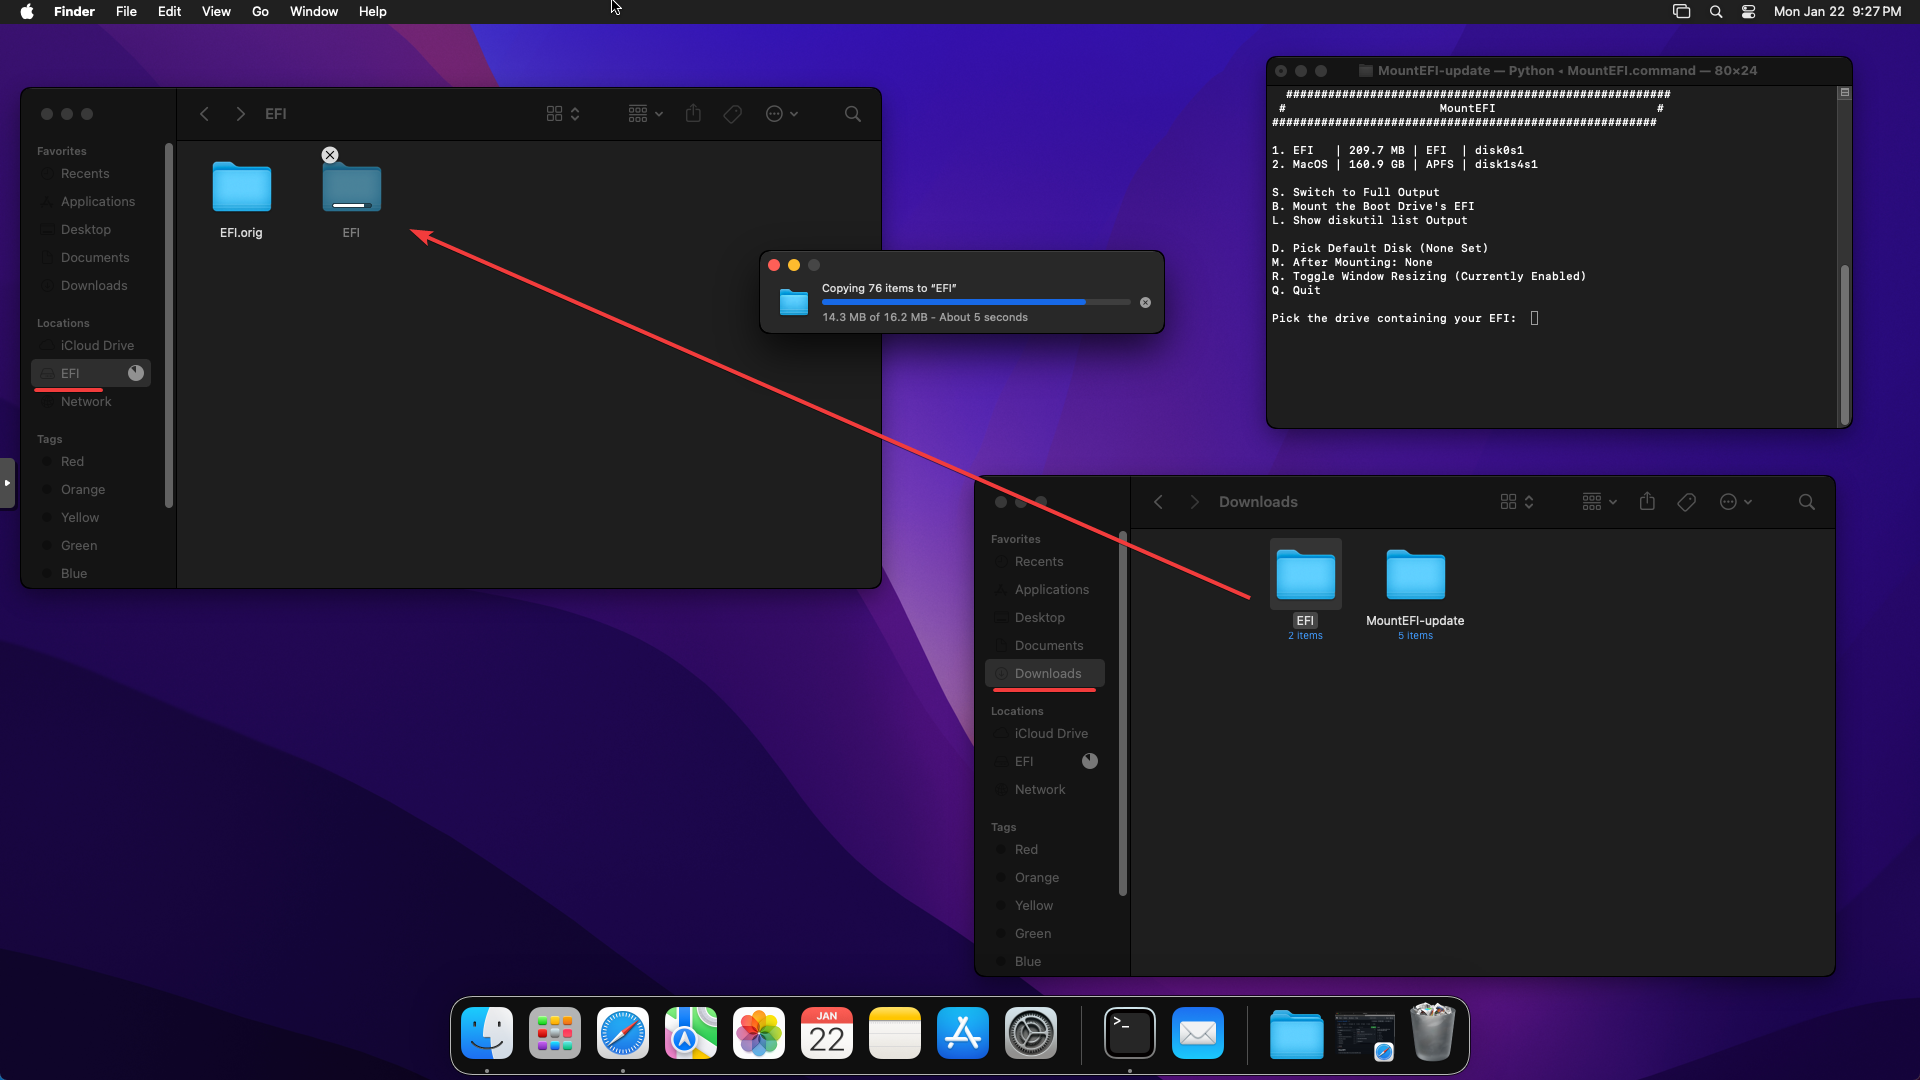
Step 6) Once the EFI folder has been copied, SHUTDOWN the vm.
Step 7) Back inside of the Proxmox web UI, Click back onto the MacOS VM and navigate to Hardware. We are going to remove the OpenCore CD/DVD Drive.
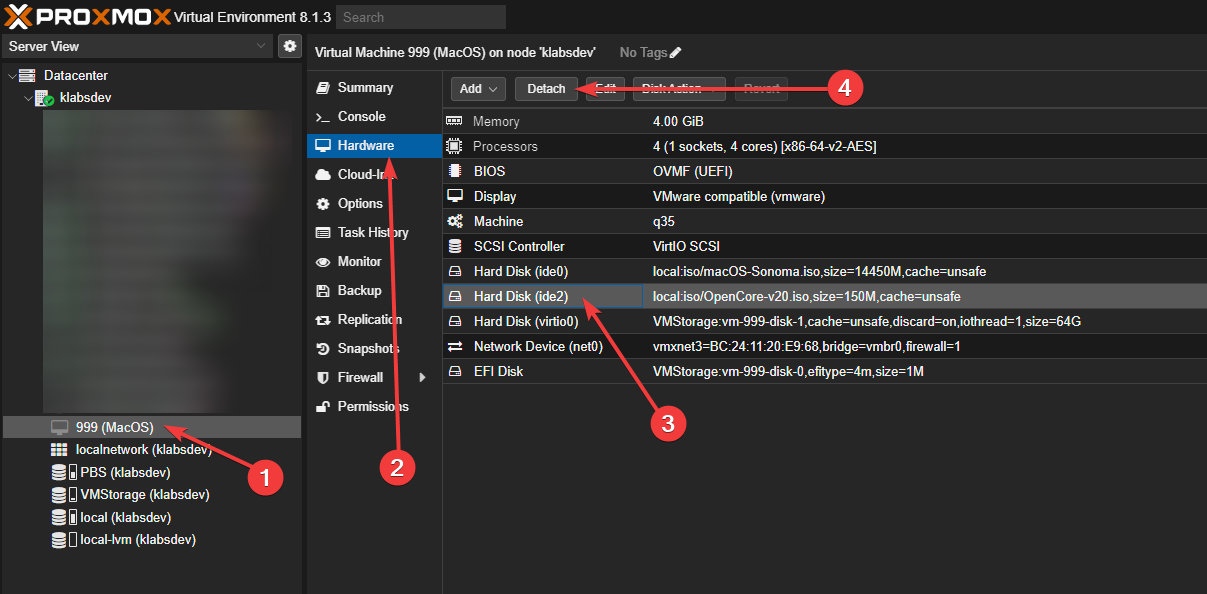
Once the disk has been detached, you can remove it. You can now boot the VM and verify you can launch into MacOS without OpenCore mounted.
Conclusion
I have been playing around with the hardware allocation and I have noticed that the performance is not fantastic. It seems that macOS 14 Sonoma does not run very well in a Proxmox virtual environment. Increasing the amount of CPU cores and RAM can help improve performance, however there are dimensioning returns. This could very very useful for testing macOS IT deployments or building software for Mac regardless of the performance.
Huge thanks for i12bretro tutorials as most of this come from their tutorials. I wanted to re-create them with screenshots for others to follow and offer the ISO images for anyone without a Mac to build them! The tutorials this one is based off of are listed below in the sources list.
Thanks for reading!
Written By: Max Kulik