
Run Proxmox on OCI - FOR FREE

Introduction
This article will walk you through the steps that I took to get Proxmox running inside of an OCI instance. Because you cannot VNC directly into an instance that is booting, this will be a great way to run services that may require some sort of connection other than RDP (Windows Server) or SSH.
In my use case, I was looking to deploy a virtual PBX to a cloud environment so all of our locations did not need to rely on our on premises server. You can imagine the chaos when the phone system goes down.
In this method, we are going to be using a custom Debian image to create a boot image on OCI and create a virtual instance. Then, once that is set up we will be manually installing Proxmox.
Step 1: Download Required Files
We need to download the Debian image required first. At the time of writing Proxmox is using Debian 11 (bullseye). Lucky for us Debian provides ready-to-deploy cloud images. The image that you will need can be download directly from them here: https://cloud.debian.org/images/cloud/
The version that I used was debian-11-genericcloud-amd64-20221205-1220.qcow2. That image can be downloaded directly here: https://cloud.debian.org/images/cloud/bullseye/20221205-1220/debian-11-genericcloud-amd64-20221205-1220.qcow2
Step 2: Create OCI Bucket
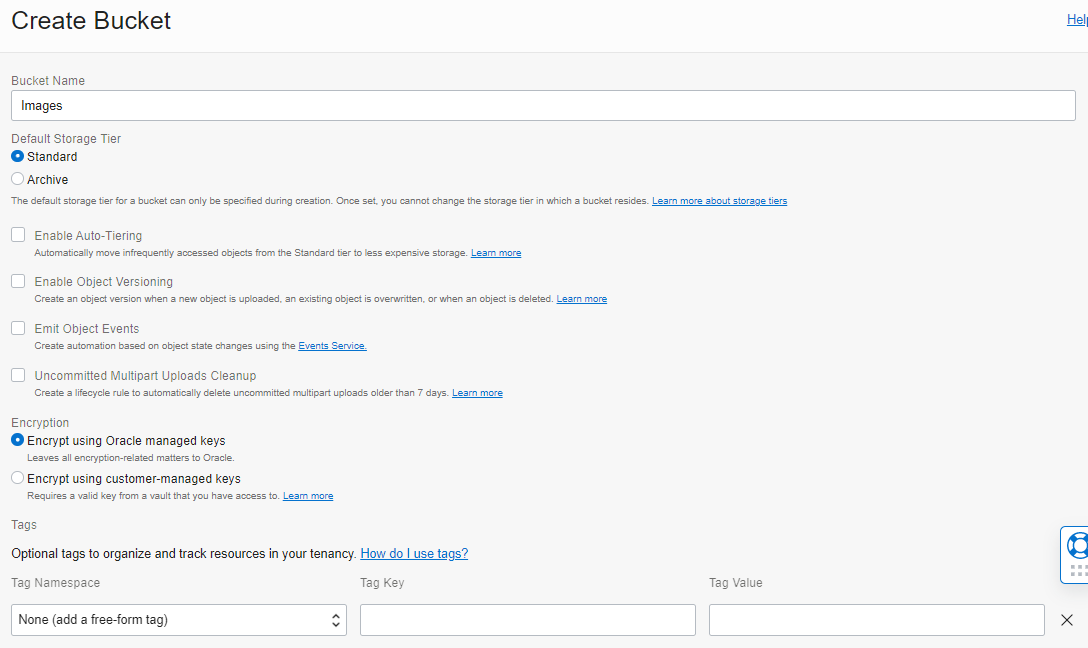
Next we will need to start getting our image ready for OCI. Once logged into your OCI Dashboard you will need to navigate to Storage -> Buckets. If you don’t already have one, create a new bucket for your custom images by clicking “Create New”. These are the options I used:
Step 3: Upload Debian to Bucket
Now that you have a bucket created, we need to click on it to open it up. Once you are in your bucket, scroll down and choose “Upload” under objects.
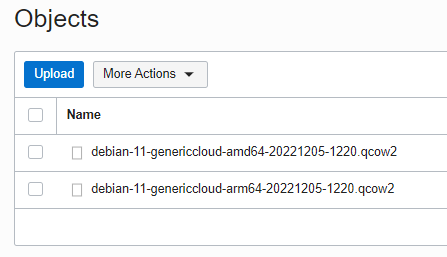
Upload the Debian image from Step 1. You can name it whatever you like.
Step 4: Make Custom Image
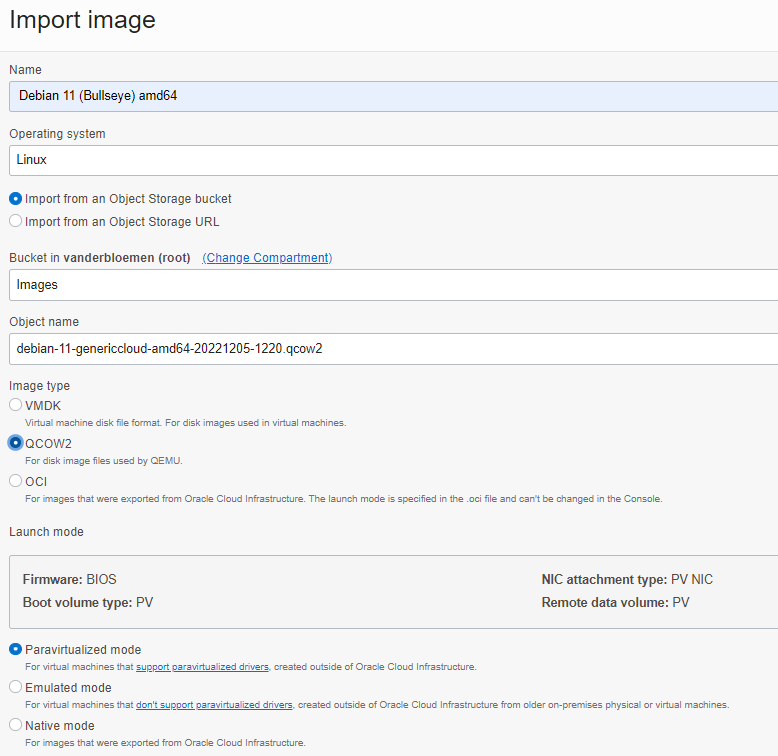
With the Debian image uploaded, it is time to convert that to an Oracle Cloud Image. To do this Navigate to Compute -> Custom Images. Once there choose “Import Image”. This is an example of the import settings you should emulate:
This will take a few mins to provision.
Step 5: Deploy Custom Image
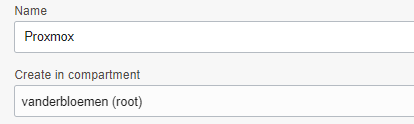
Now that our Custom Image has been provisioned, we can now create our custom image. Navigate to Compute -> Instances and choose “Create Instance”. On the “Create compute instance” page start off by creating a name for your Proxmox instance. I called mine “Proxmox”.
Then choose your Availability Domain
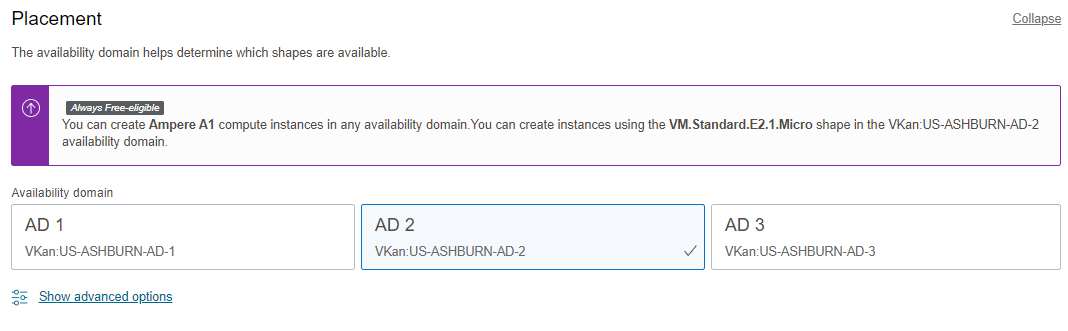
Then When it comes time to choose your Image make sure to choose “Custom Images” and pick the Debian one that we created. Next, choose your shape. You CAN run this on OCI’s “Always Free-eligible” Tier if you’d like.
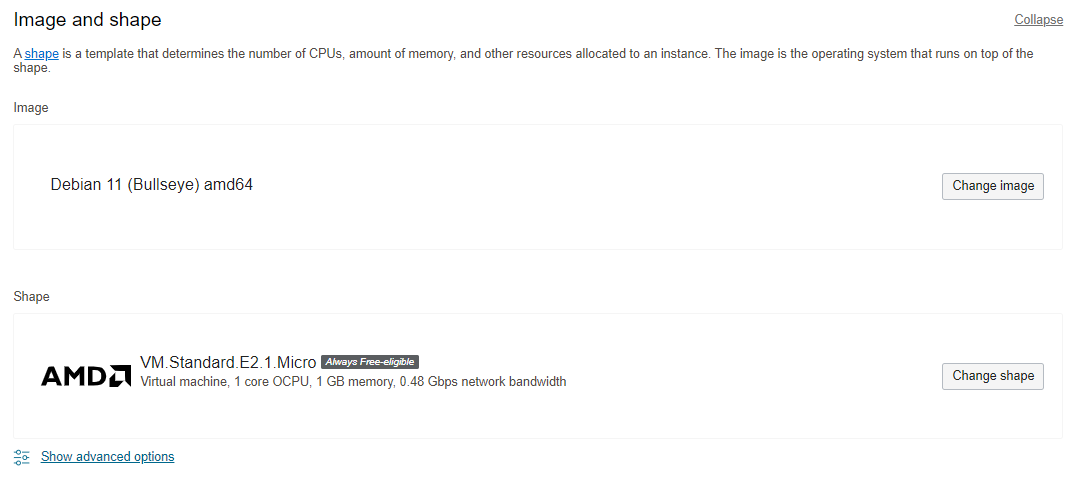
(Important Note Here) If you would like to run this on Ampere, you can do this by using all the previous steps but using the Debian arm64 Image! Next, select all your networking settings. You can make a separate subnet for this Proxmox machine if you’d like but it’s not necessary.
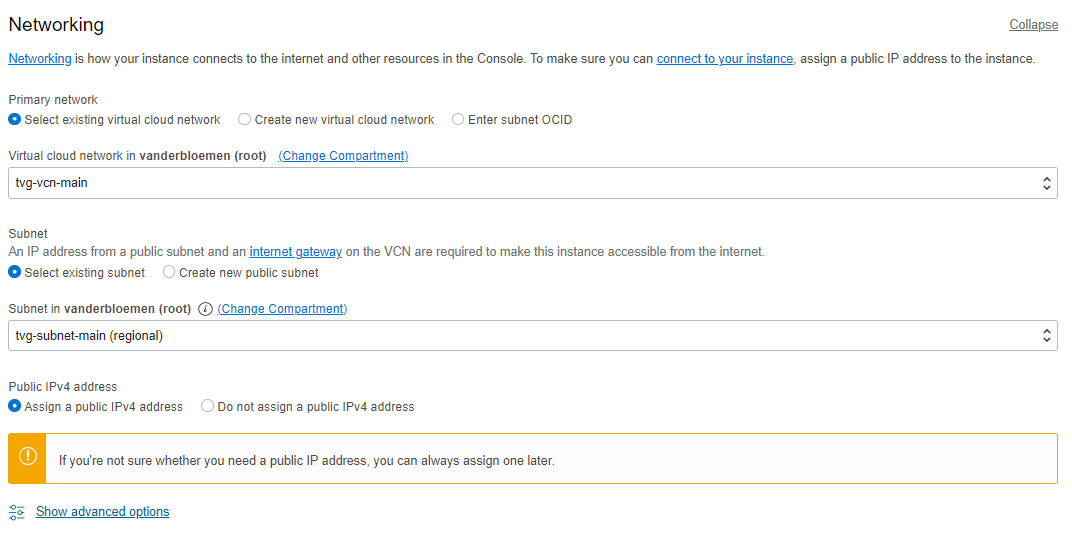
Finally, make sure to download your SSH Keys. This is what will allow you to SSH into your machine once it’s up and running! Go ahead and Choose “Create” to start up your new Debian image. Wait for OCI to finish provisioning your machine and move on to step 6.
Step 6: Installing Proxmox
Using your instance’s public IP address and the key that you downloaded, SSH into your instance. On Windows I use MobaXterm, regular SSH on macOS or Linux is perfectly fine. From here we will run the required commands in order to prep and install Proxmox.
We Will start by making sure the OS is up-to-date
sudo apt update && sudo apt upgrade
Now we begin to install Proxmox manually.
Because this image is set up for a cloud environment, we need to edit the cloud.cfg first. We WILL NOT be adjusting the hosts file directly.
sudo nano /etc/cloud/cloud.cfg
Make sure to set preserve_hostname to true.
preserve_hostname: trueThen below that line add:
hostname: proxmoxNow we need to edit the cloud master file found at /etc/cloud/templates/hosts.debian.tmpl.
sudo nano /etc/cloud/templates/hosts.debian.tmpl
By default, my hosts file looked like this:
127.0.1.1
127.0.0.1 localhost
I changed it to look like this:
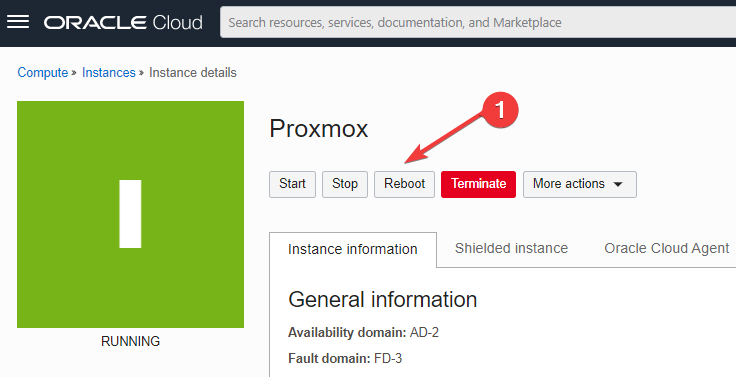
129.xx.xxx.xxx proxmox.mydomainname.com proxmoxThen once that is finished you will need to reboot your instance from the OCI dashboard.
Once the Reboot has finished, SSH back into your instance and verify the change has been made with this command:
hostname --ip-address
Your output should look like this:
129.xx.xxx.xxxNow we need to add the Proxmox VE repo:
sudo nano /etc/apt/sources.list.d/pve-install-repo.list
Then add this line:
deb [arch=amd64] http://download.proxmox.com/debian/pve bullseye pve-no-subscriptionAdd the Proxmox VE repository key as sudo:
sudo wget https://enterprise.proxmox.com/debian/proxmox-release-bullseye.gpg -O /etc/apt/trusted.gpg.d/proxmox-release-bullseye.gpg
Now update and upgrade your instance:
sudo apt update && sudo apt upgrade
Next we need to install the Proxmox VE kernel:
sudo apt install pve-kernel-5.15
If apt asks if you would like to install the new version of grub, be sure to select “Keep the local version currently installed”. We will be manually updating grub later.

Once the Kernel has finished installing make sure to reboot the system using OCI dashboard.

Once the system has rebooted, SSH back into your instance and you can Install the Proxmox VE packages.
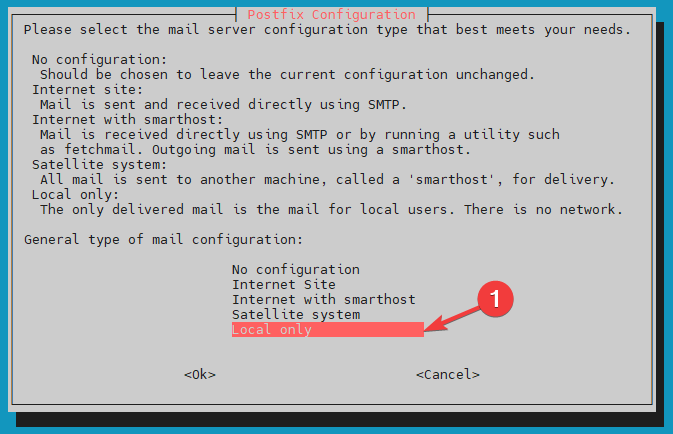
sudo apt install proxmox-ve postfix open-iscsi
Choose “Local only” for postfix when prompted.
After all the packages have been installed, it is time to remove the previous Debian Kernel and update Grub:
apt remove linux-image-amd64 'linux-image-5.10*'
Update Grub manually to use the Kernal installed by Proxmox:
sudo update-grub
Verify that os-prober package is NOT installed:
sudo apt remove os-prober
Step 7: Configure Proxmox
To enable us to log into the Proxmox Web UI, we will need to set the root user password.
sudo passwd root
With the root password set, you can now log into your Proxmox Web UI:
https://youriphere:8006
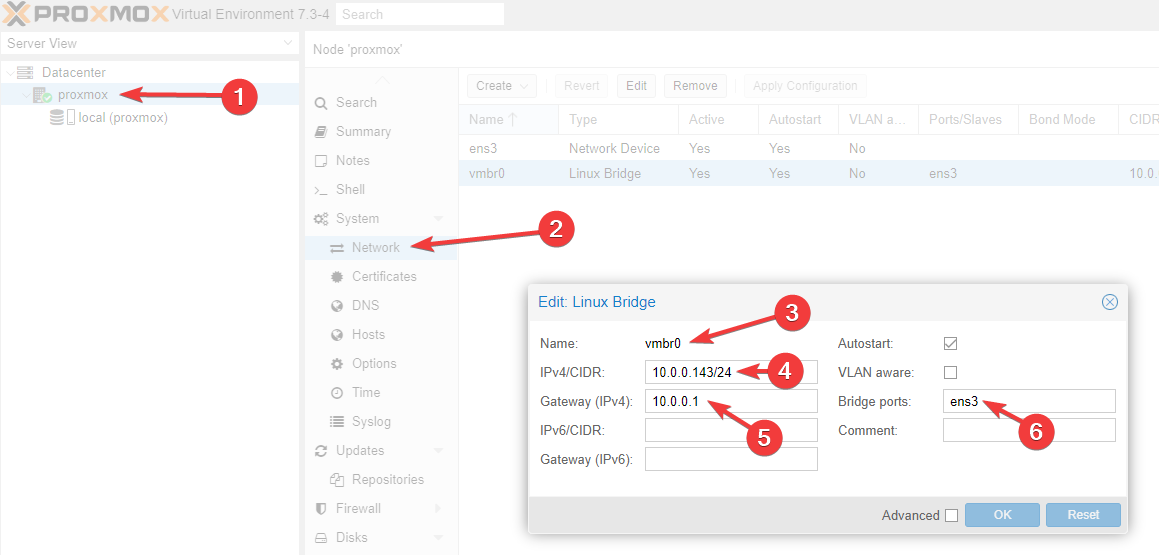
In the Proxmox Web UI, go to your machine’s network settings. You will notice it is asking you to create the VM Bridge network since it does not create that by default. We are going to create this network now!
Fill in the sections below to match the Virtual Bridge to you OCI dashboard. Pictured below are my settings:
Reboot the instance one more time using the OCI dashboard, NOT THE PROXMOX WEB UI, after these changes have been made. Once the reboot has finished, you will not be able to SSH to the instance OR access the WEB UI.
In the OCI Dashboard, select your Instance and open “Console connection”
Compute → Instances → Instance details → Console connection
Then click on “Launch Cloud Shell Connection”
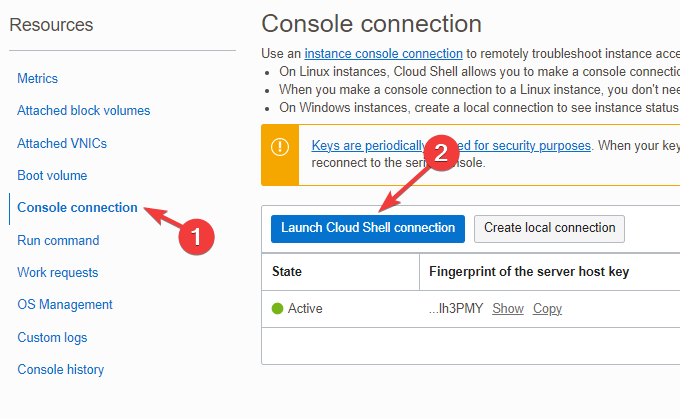
It will take a few mins for the console to open, but once it does log in using the “root” user and the password you had created in Step 7.
Once logged in, get your interface names:
ip -br -c addr show
Make note of these. For me I had 3: lo, ens3, and vmbr0. You will notice that both ens3 and vmbr0 are reporting as down.

To fix this we will need to edit /etc/network/interfaces:
nano /etc/network/interfaces
And then adjust your file to match this using your network information:
auto lo
iface lo inet loopback

auto ens3

iface ens3 inet manual

auto vmbr0
iface vmbr0 inet static
        address 10.0.0.143/24
        gateway 10.0.0.1
        bridge-ports ens3
        bridge-stp off
        bridge-fd 0

# source-directory /etc/network/interfaces.d
# source-directory /run/network/interfaces.d
Once you have saved your changes we can now up the interfaces.
ifup ens3
ifup vmbr0
Conclusion
After you have upped your interfaces, your Proxmox install is complete and can now be accessed from the Proxmox Web UI and SSH once again. From here you can make any adjustmets to Proxmox from the web UI. Thanks so much for reading!
Thanks for reading!
Written By: Max Kulik
Sources:
- Install Proxmox VE on Debian 11 Bullseye - https://pve.proxmox.com/wiki/Install_Proxmox_VE_on_Debian_11_Bullseye
- Root Password Reset - https://pve.proxmox.com/wiki/Root_Password_Reset
- Debian Cloud images: https://cloud.debian.org/images/cloud/bullseye/20221205-1220/
- Web UI Unreachable After Adding NVME Drive - https://forum.proxmox.com/threads/webui-unreachable-after-adding-nvme-drive.85500/
- Losing Network Connection after each Proxmox Reboot - https://forum.proxmox.com/threads/losing-network-connection-after-each-proxmox-reboot.108528/